How To Harvest Rain
Time to join the movement. Harvesting rainwater is easier than you think. With just six tools (three of which you likely already have) and six simple steps, you'll have a rain barrel installed in under 30 minutes. It can last for over a decade and save you money on your water bill, eventually paying for itself. You can also ask your gardener (or local gardener) to install it for you. See the suggested product links below—using the correct products is important, as the wrong ones can affect the barrel’s durability and finish.
How To Install A Rain Barrel
-
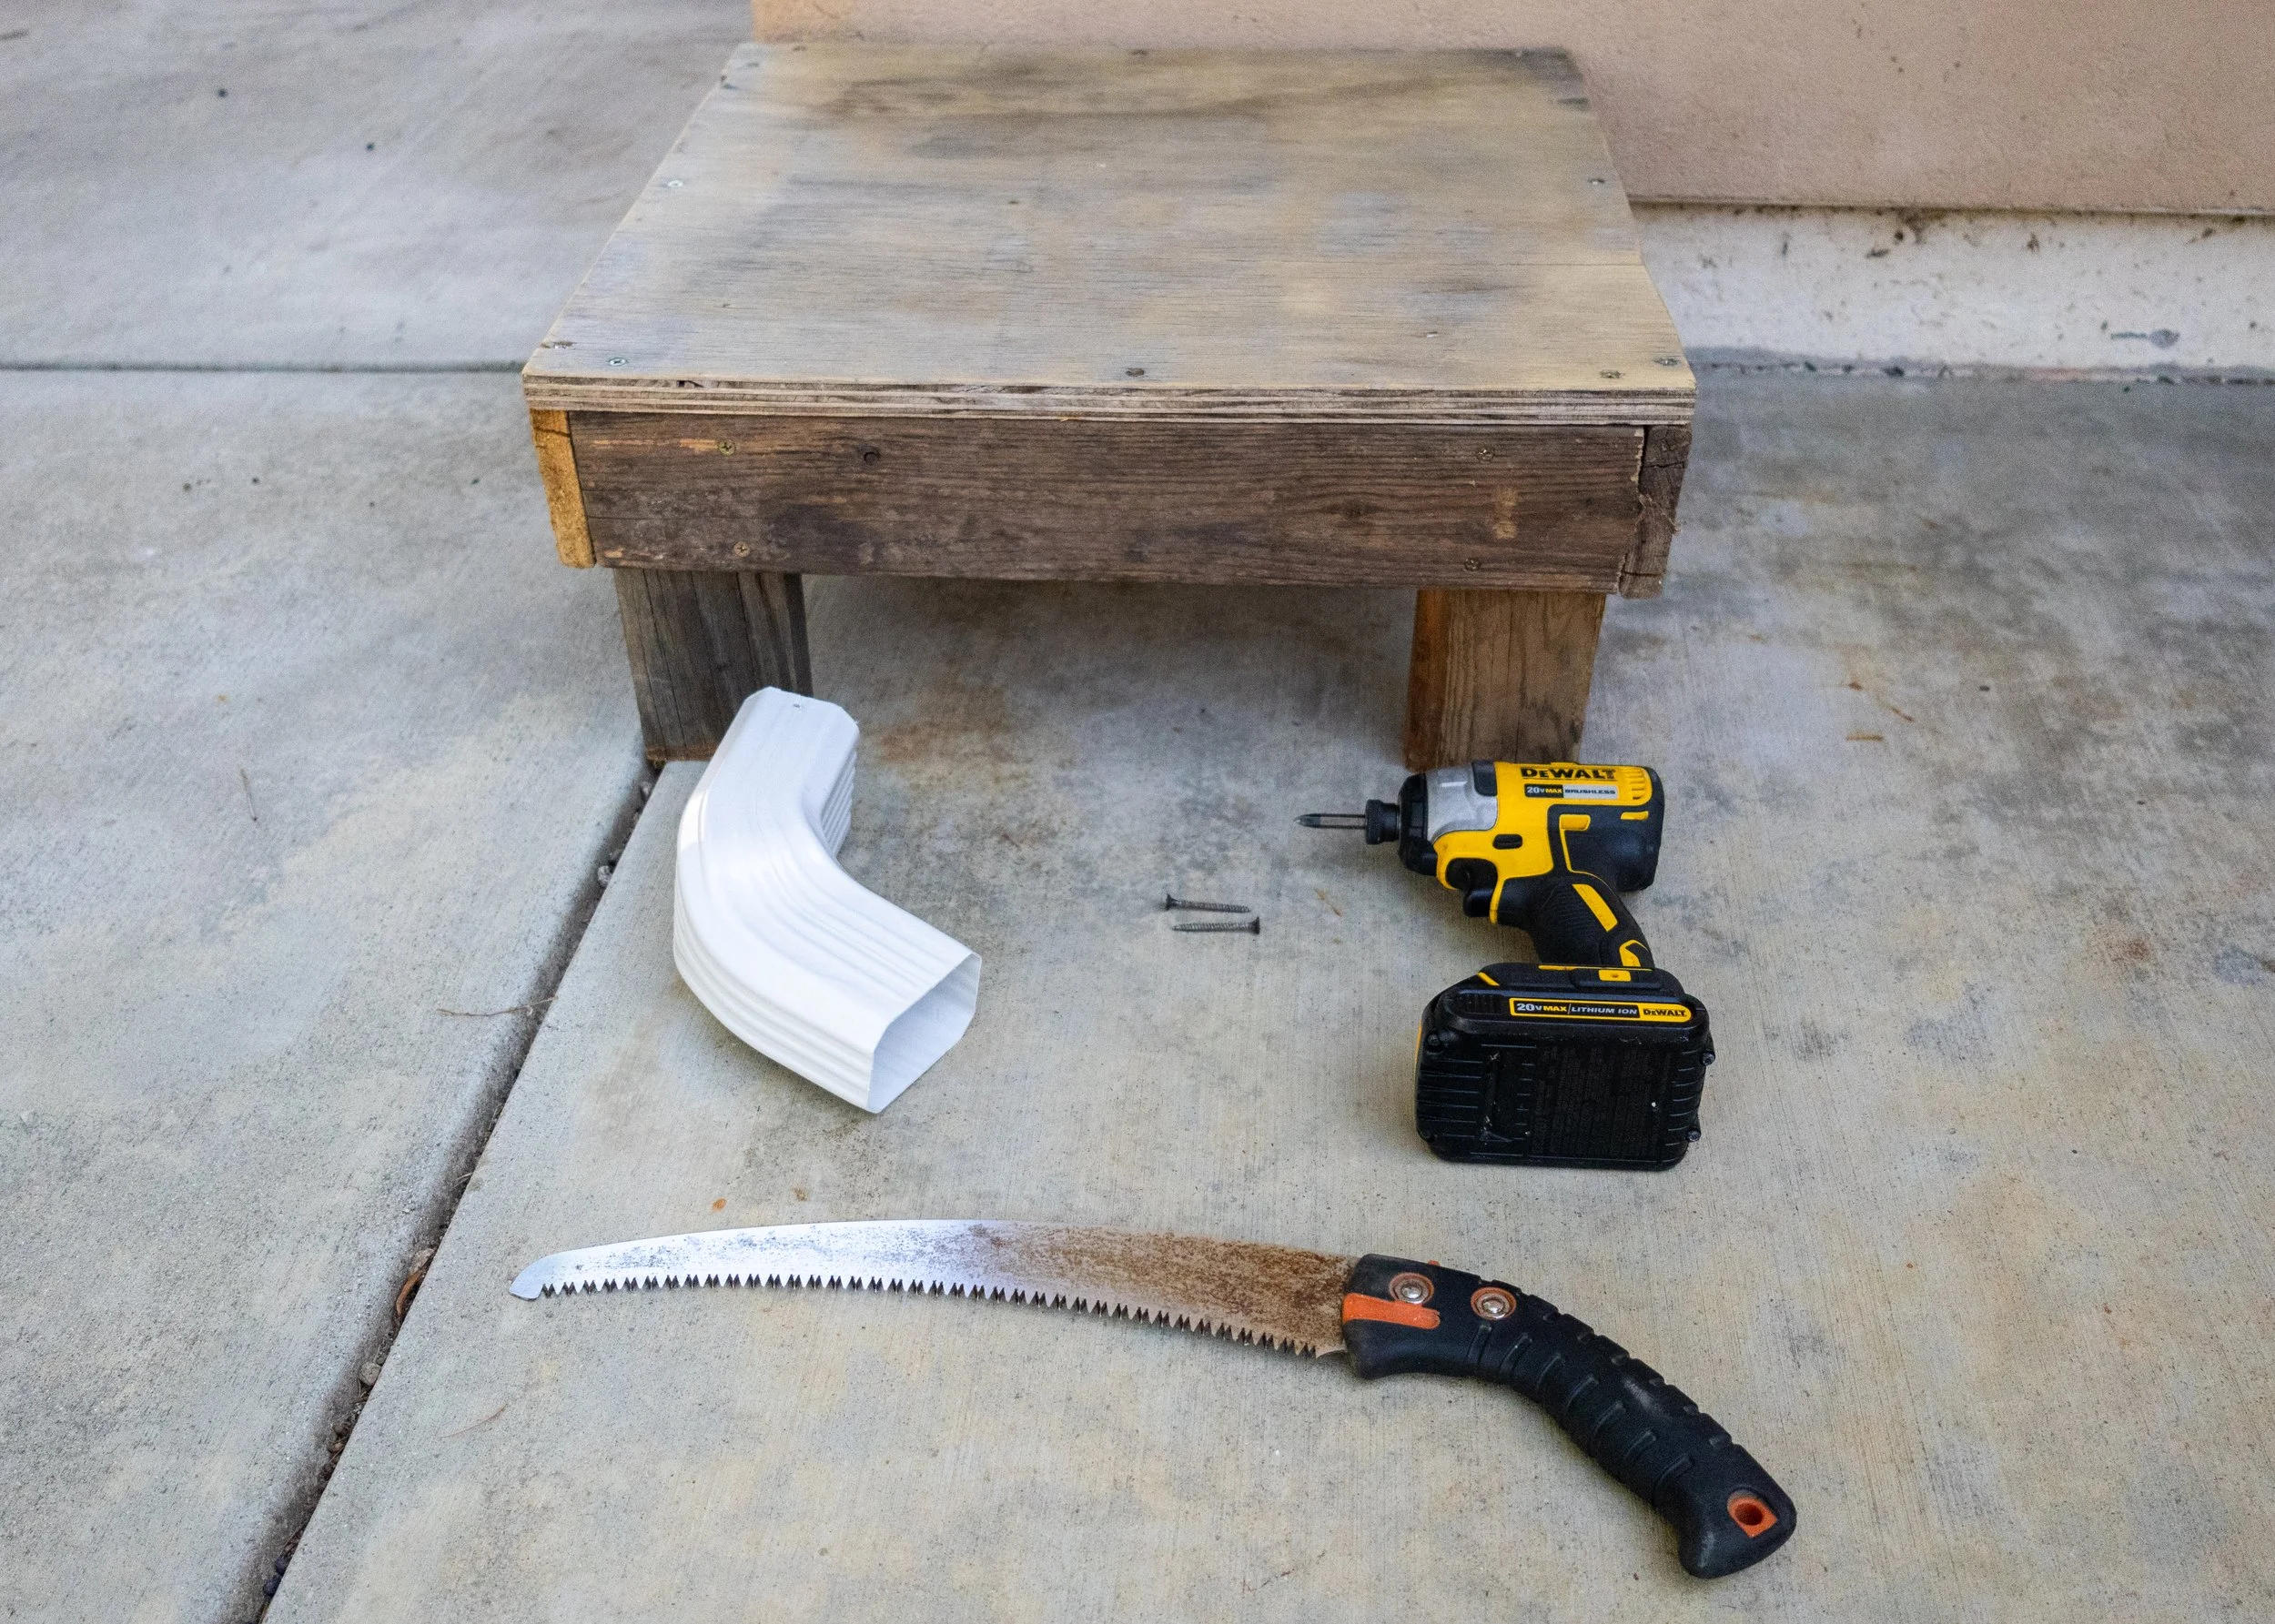
1. Gather tools
First, you will need to gather the tools for installing a rain barrel. You will need: Rain barrel, hacksaw, stand or cement blocks, drill & screws, flexible elbow or diverter. See the suggested product links below.
-

2. Choose location
Choose the roof downspout(s) you will be using. Choose a spot close to your garden or plants so the collected water is easy to use.
-
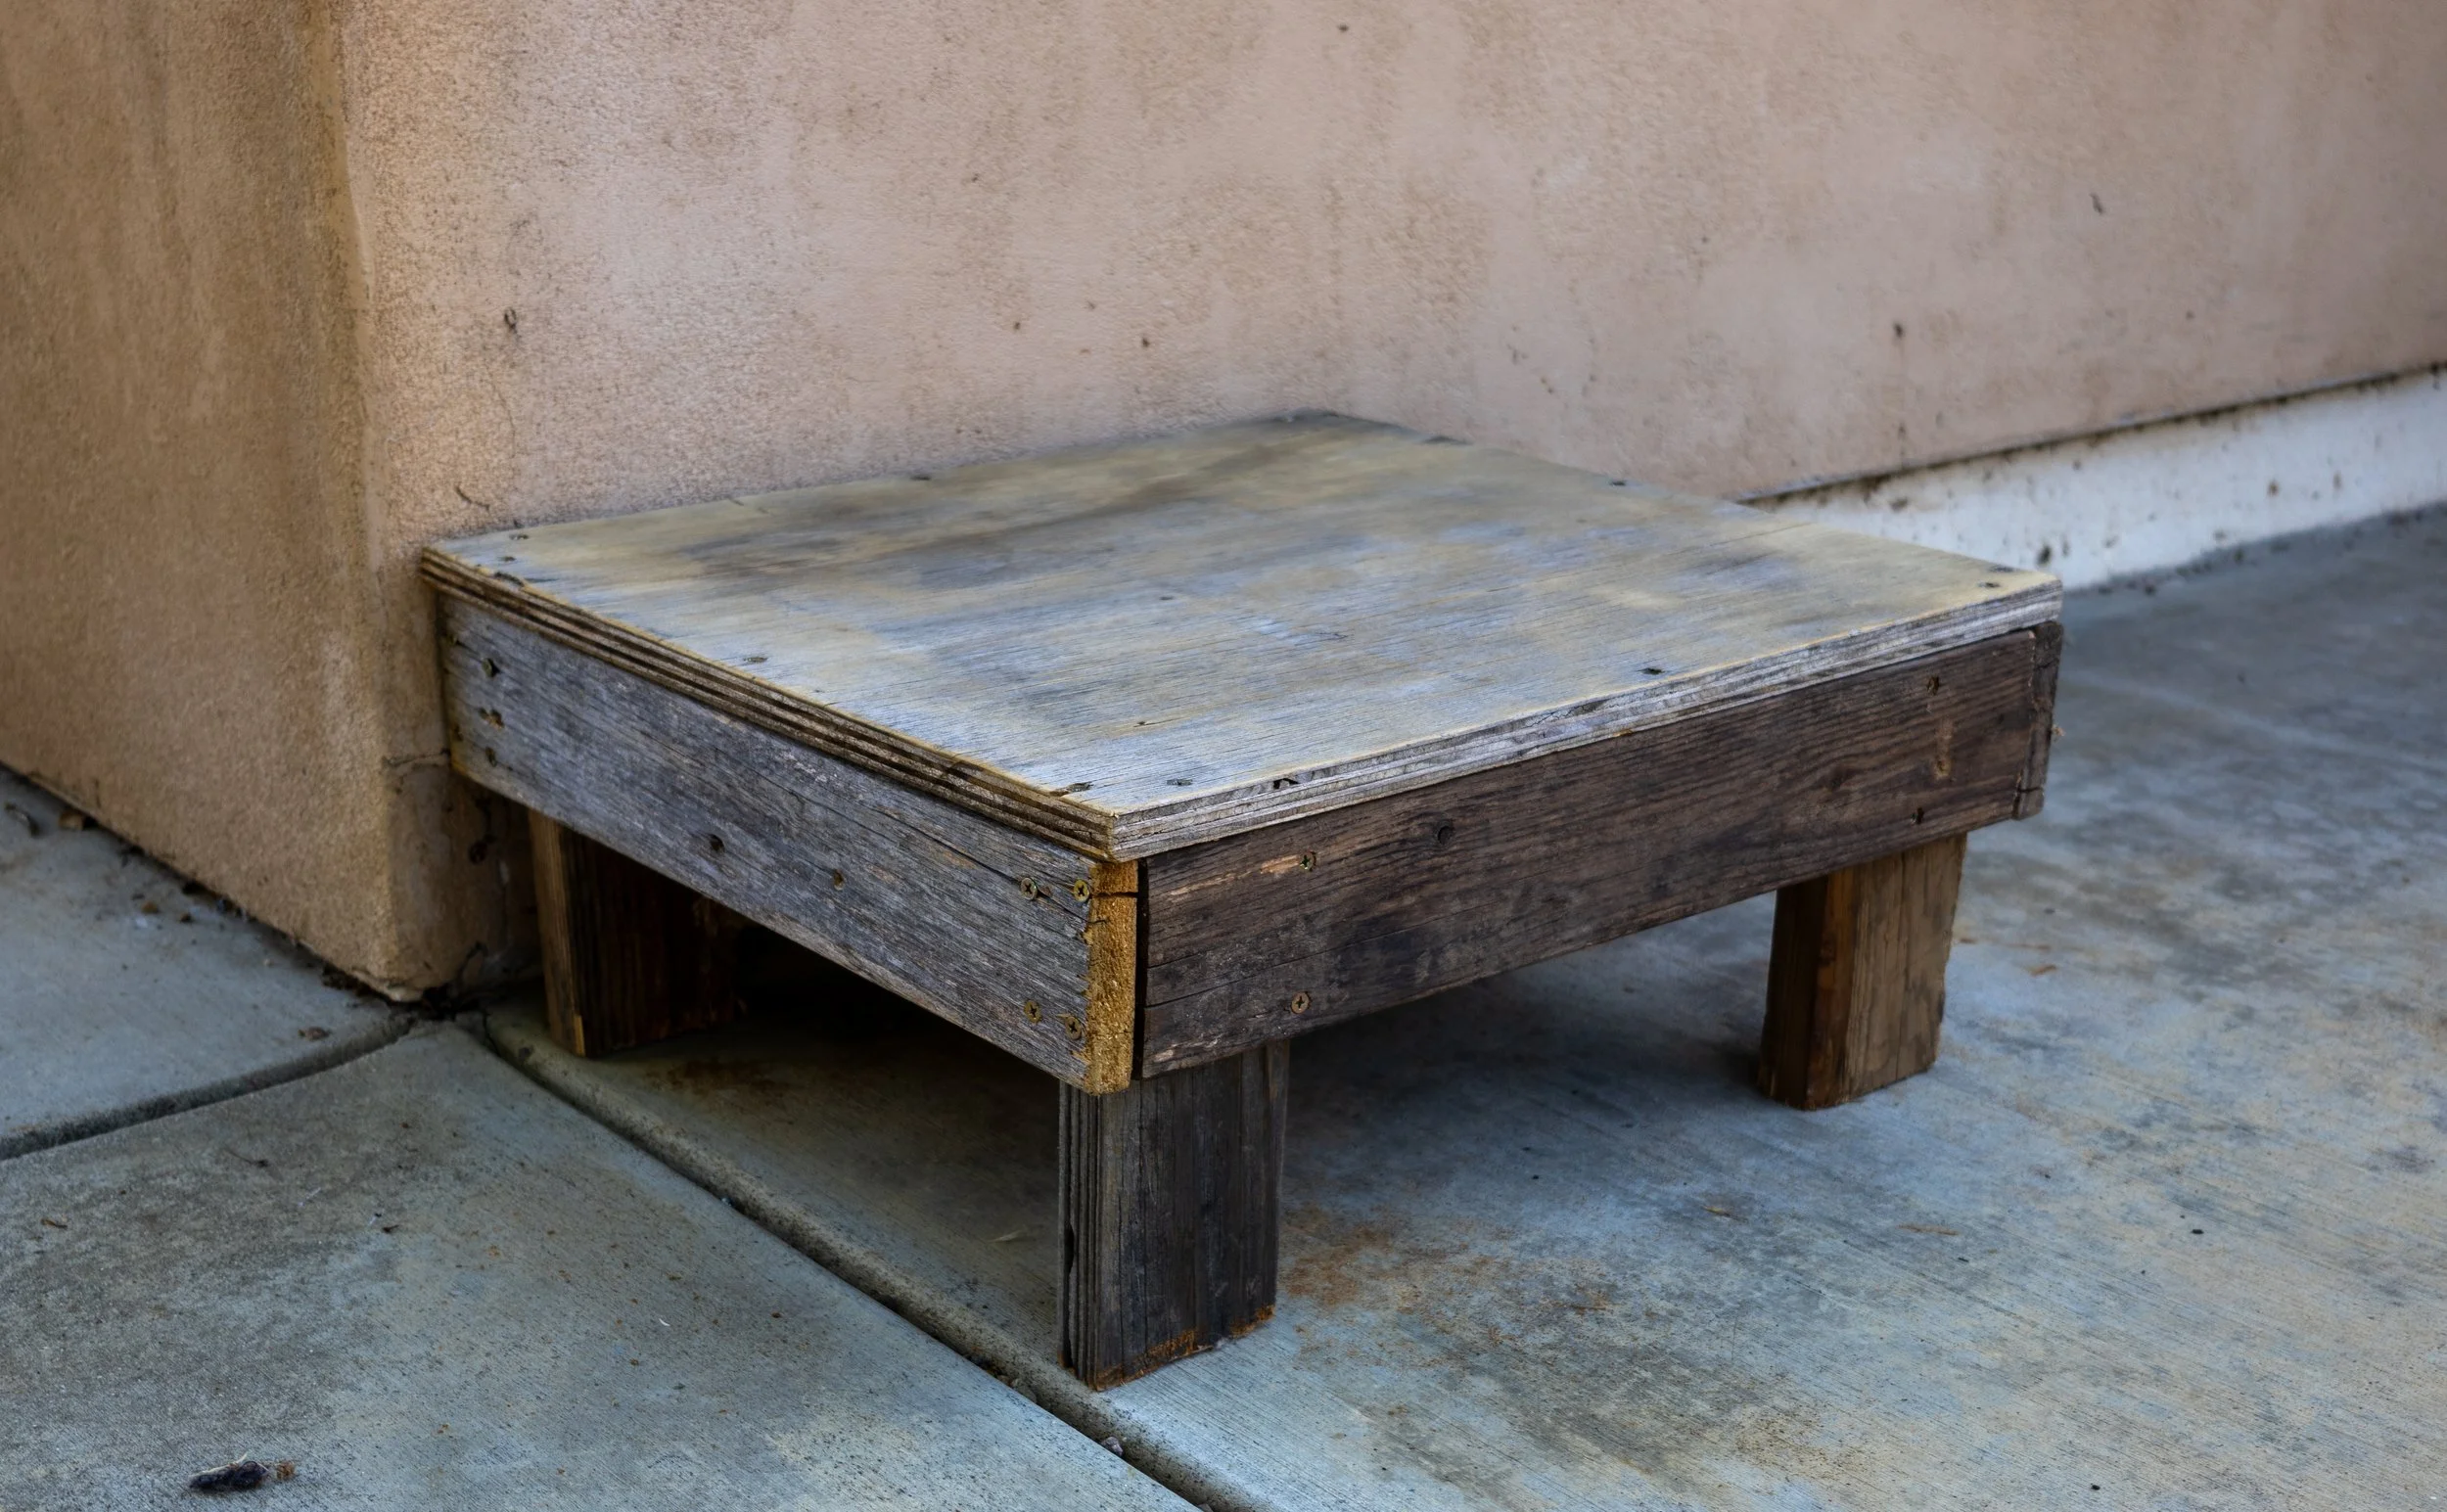
3. Create a stable base
Level the ground under your chosen downspout. If on dirt, create a firm base using compacted gravel or concrete pavers to prevent sinking. Then elevate the barrel on bricks, concrete blocks, or a small wooden platform to improve water flow and make filling easier.
-
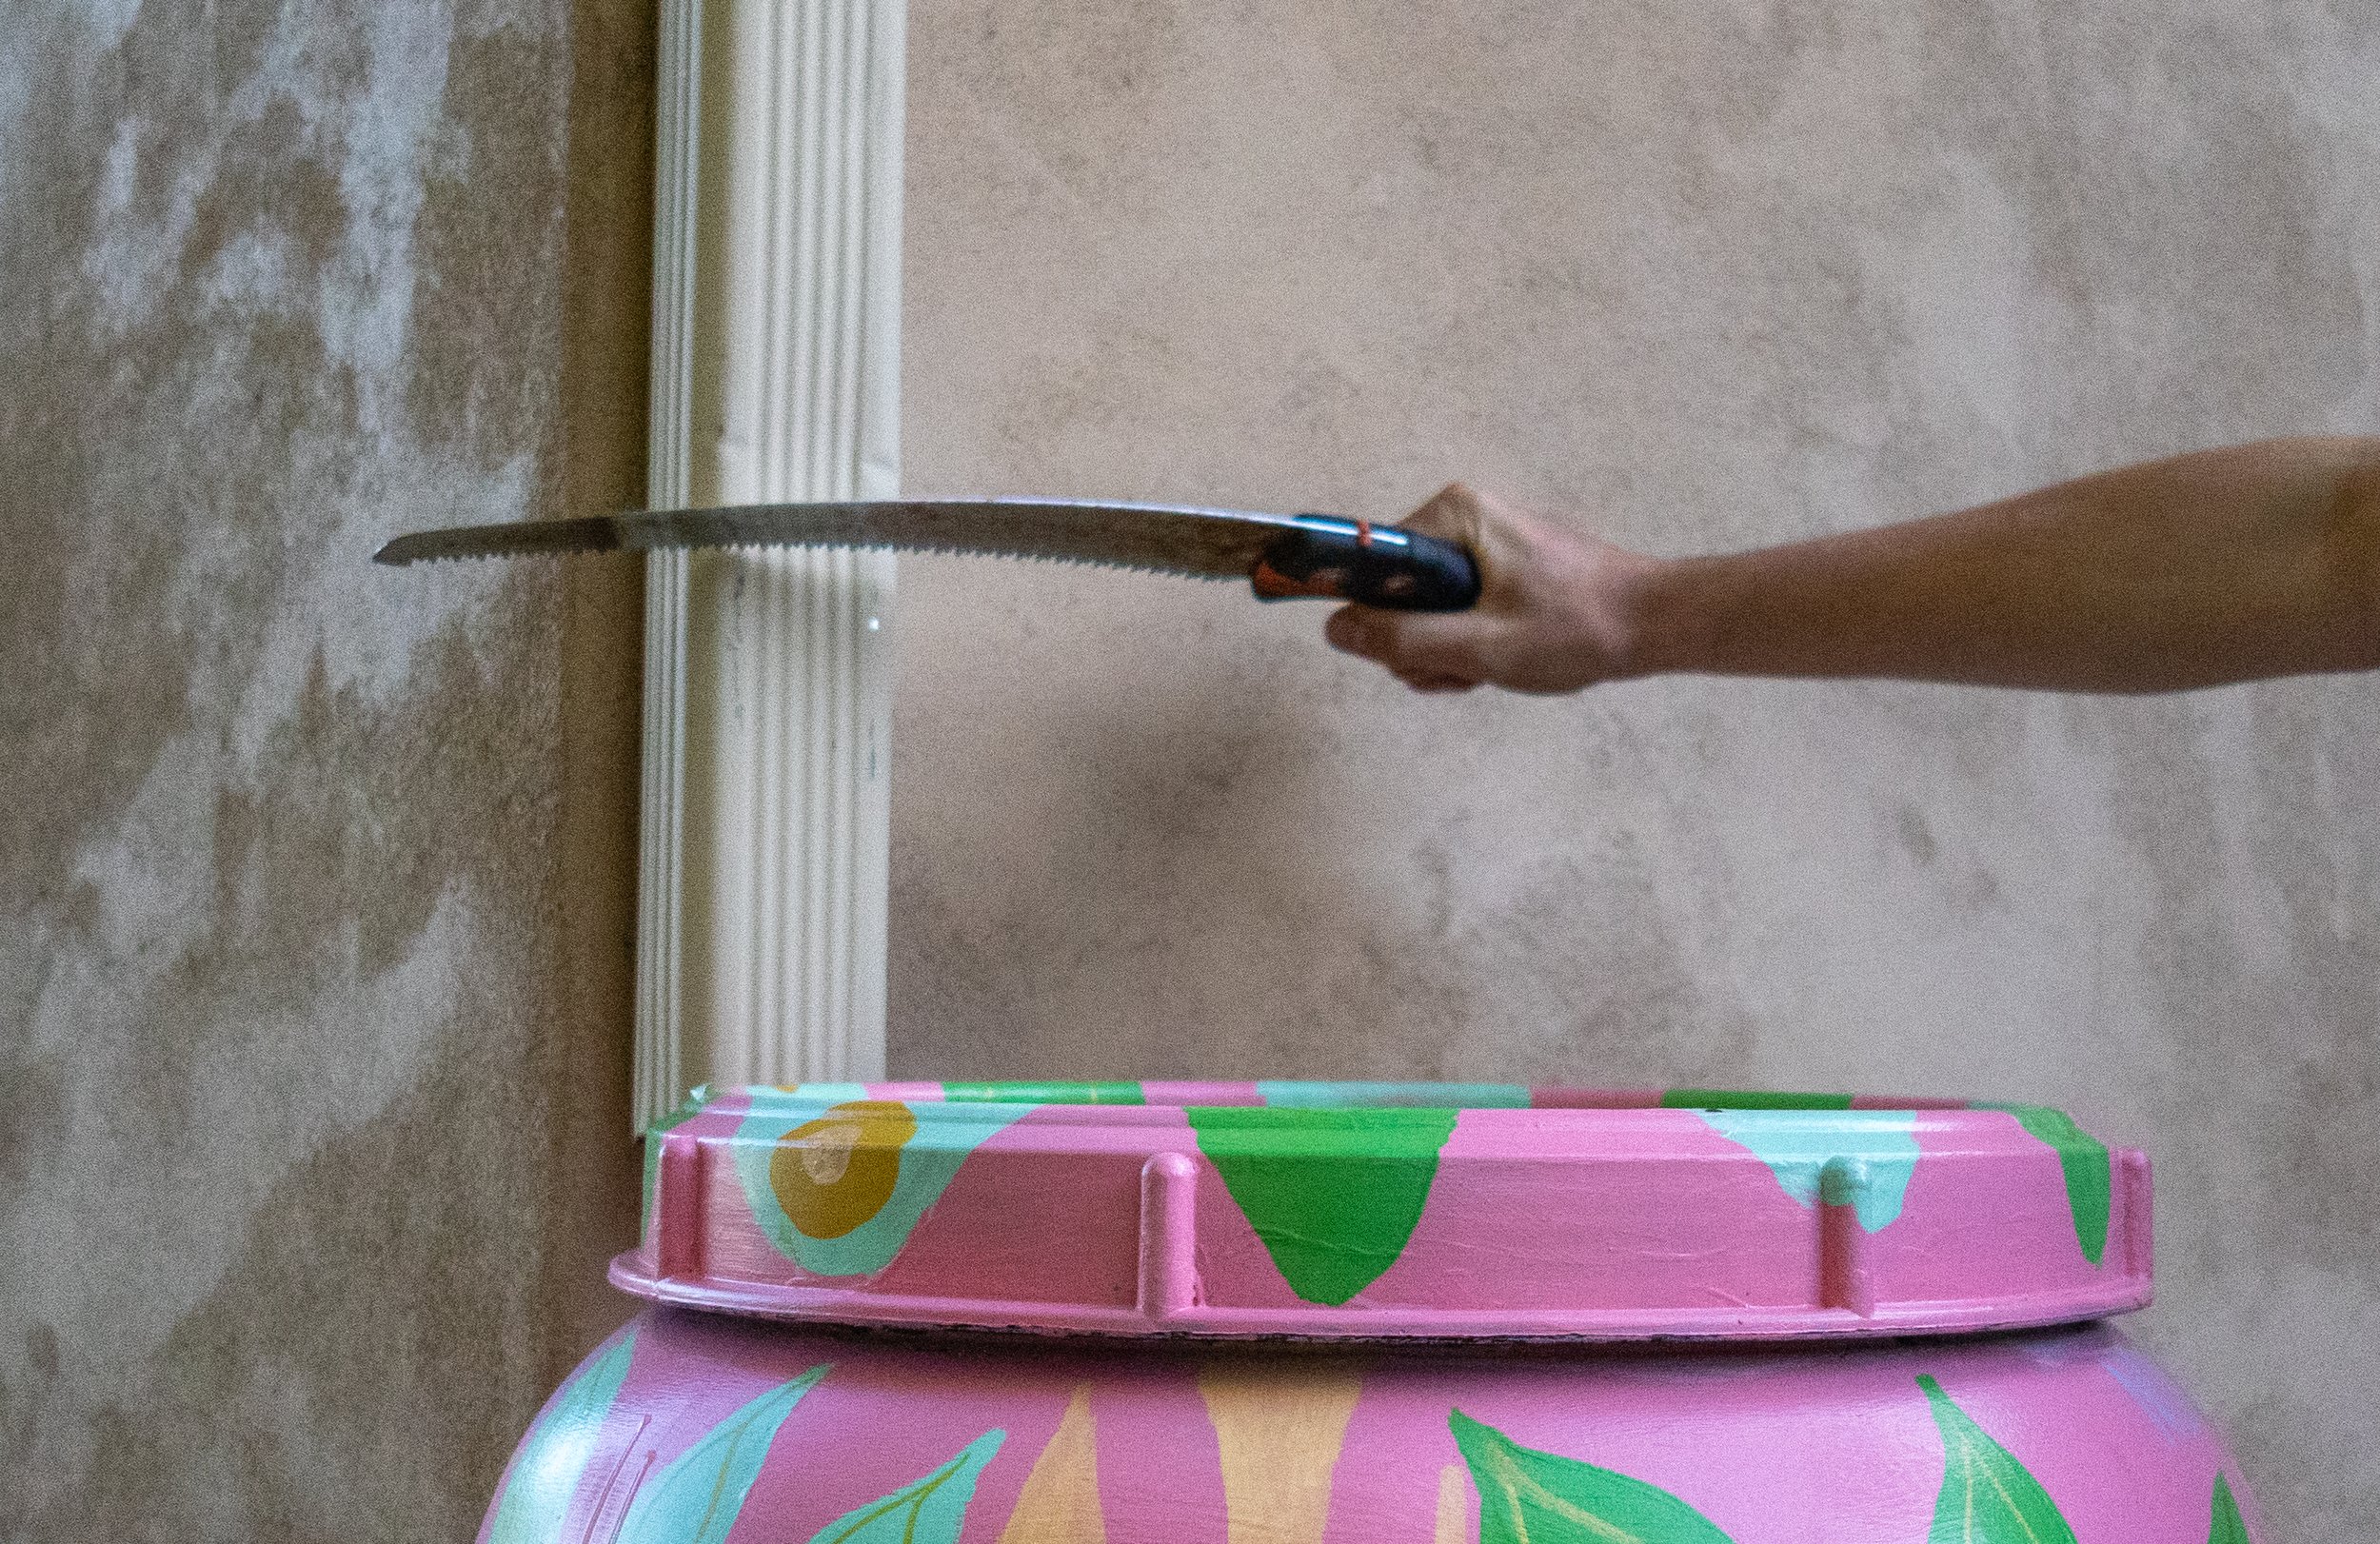
4. Mark and cut downspout
After placing the barrel on top of the riser, mark the downspout just above the barrel’s inlet. A sharpie/marker works best for this. Then carefully cut the downspout using a hacksaw or tin snips. If accessible, this step can be easier by unscrewing your downspout and cutting it on a table. Take your time so the cut is straight and clean.
-
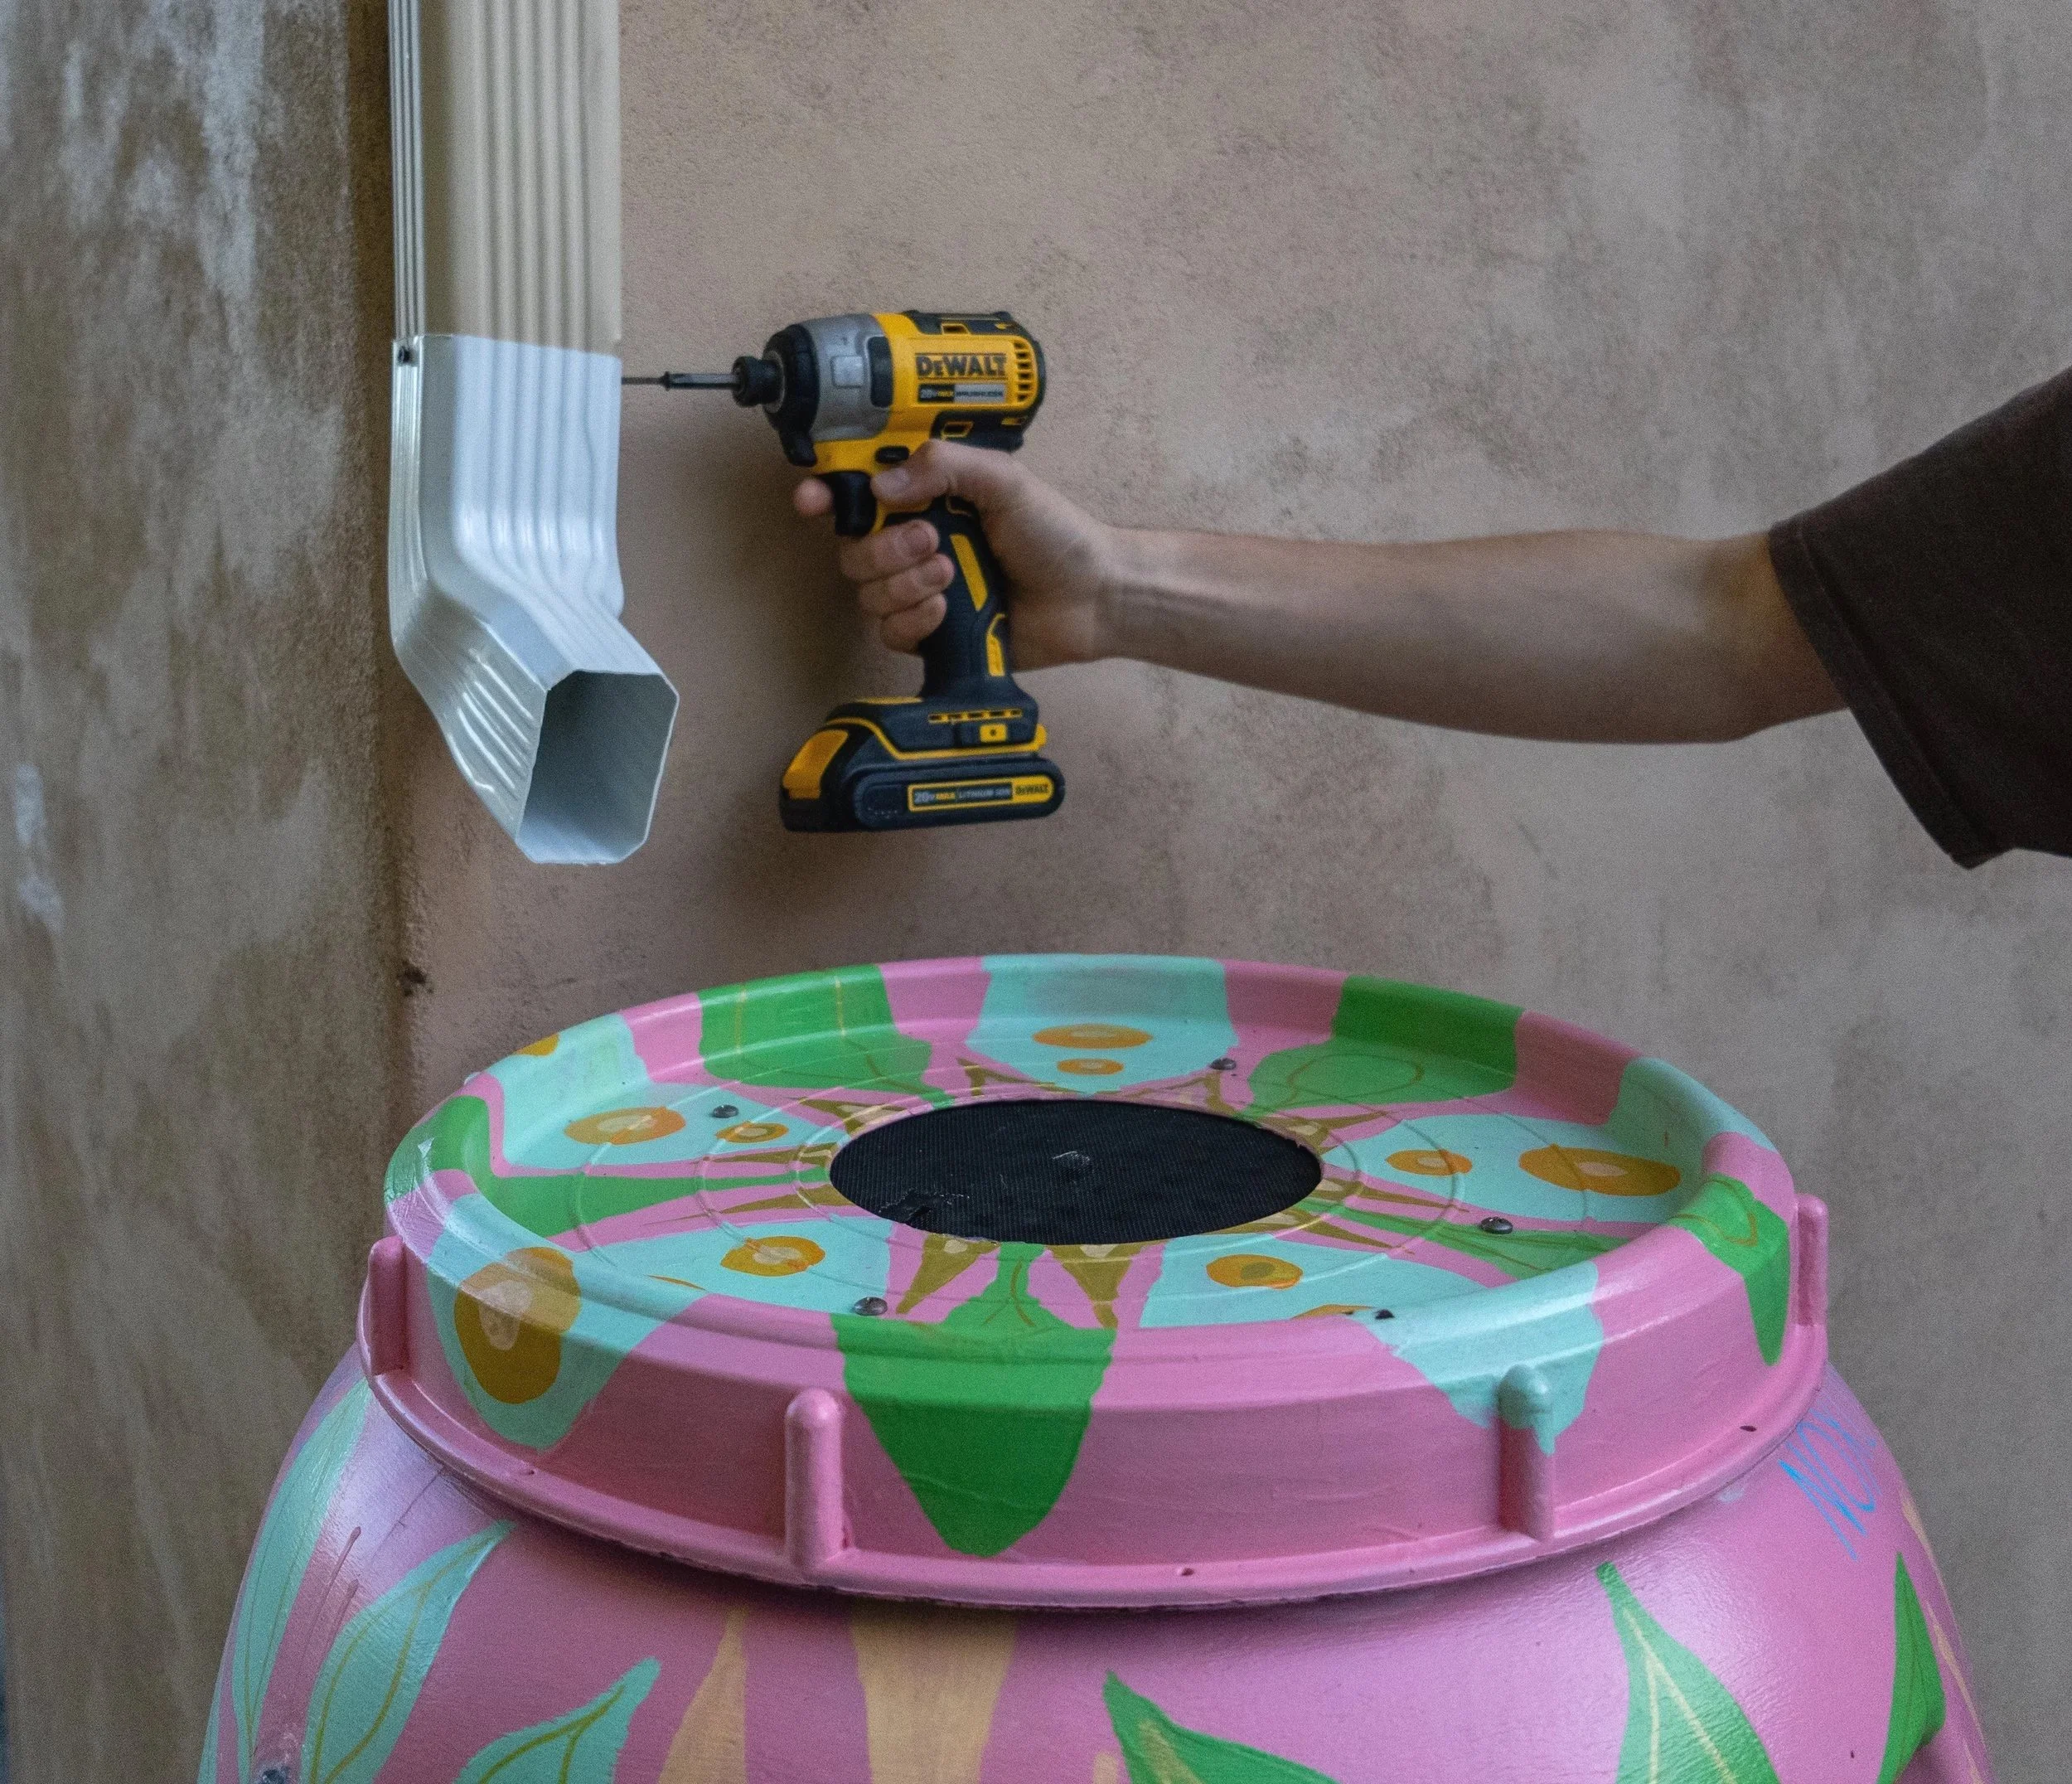
5. Install diverter or elbow
Attach a downspout diverter or elbow to the cut section of the downspout. A diverter diverts all the water to the rain barrel, while an elbow redirects rainwater from the gutter into the rain barrel while still allowing overflow to continue down the drain when the barrel is full. Follow the instructions on your specific diverter/elbow. Screw it in place if needed. Direct the opening of the diverter/elbow to the inlet on the rain barrel.
-
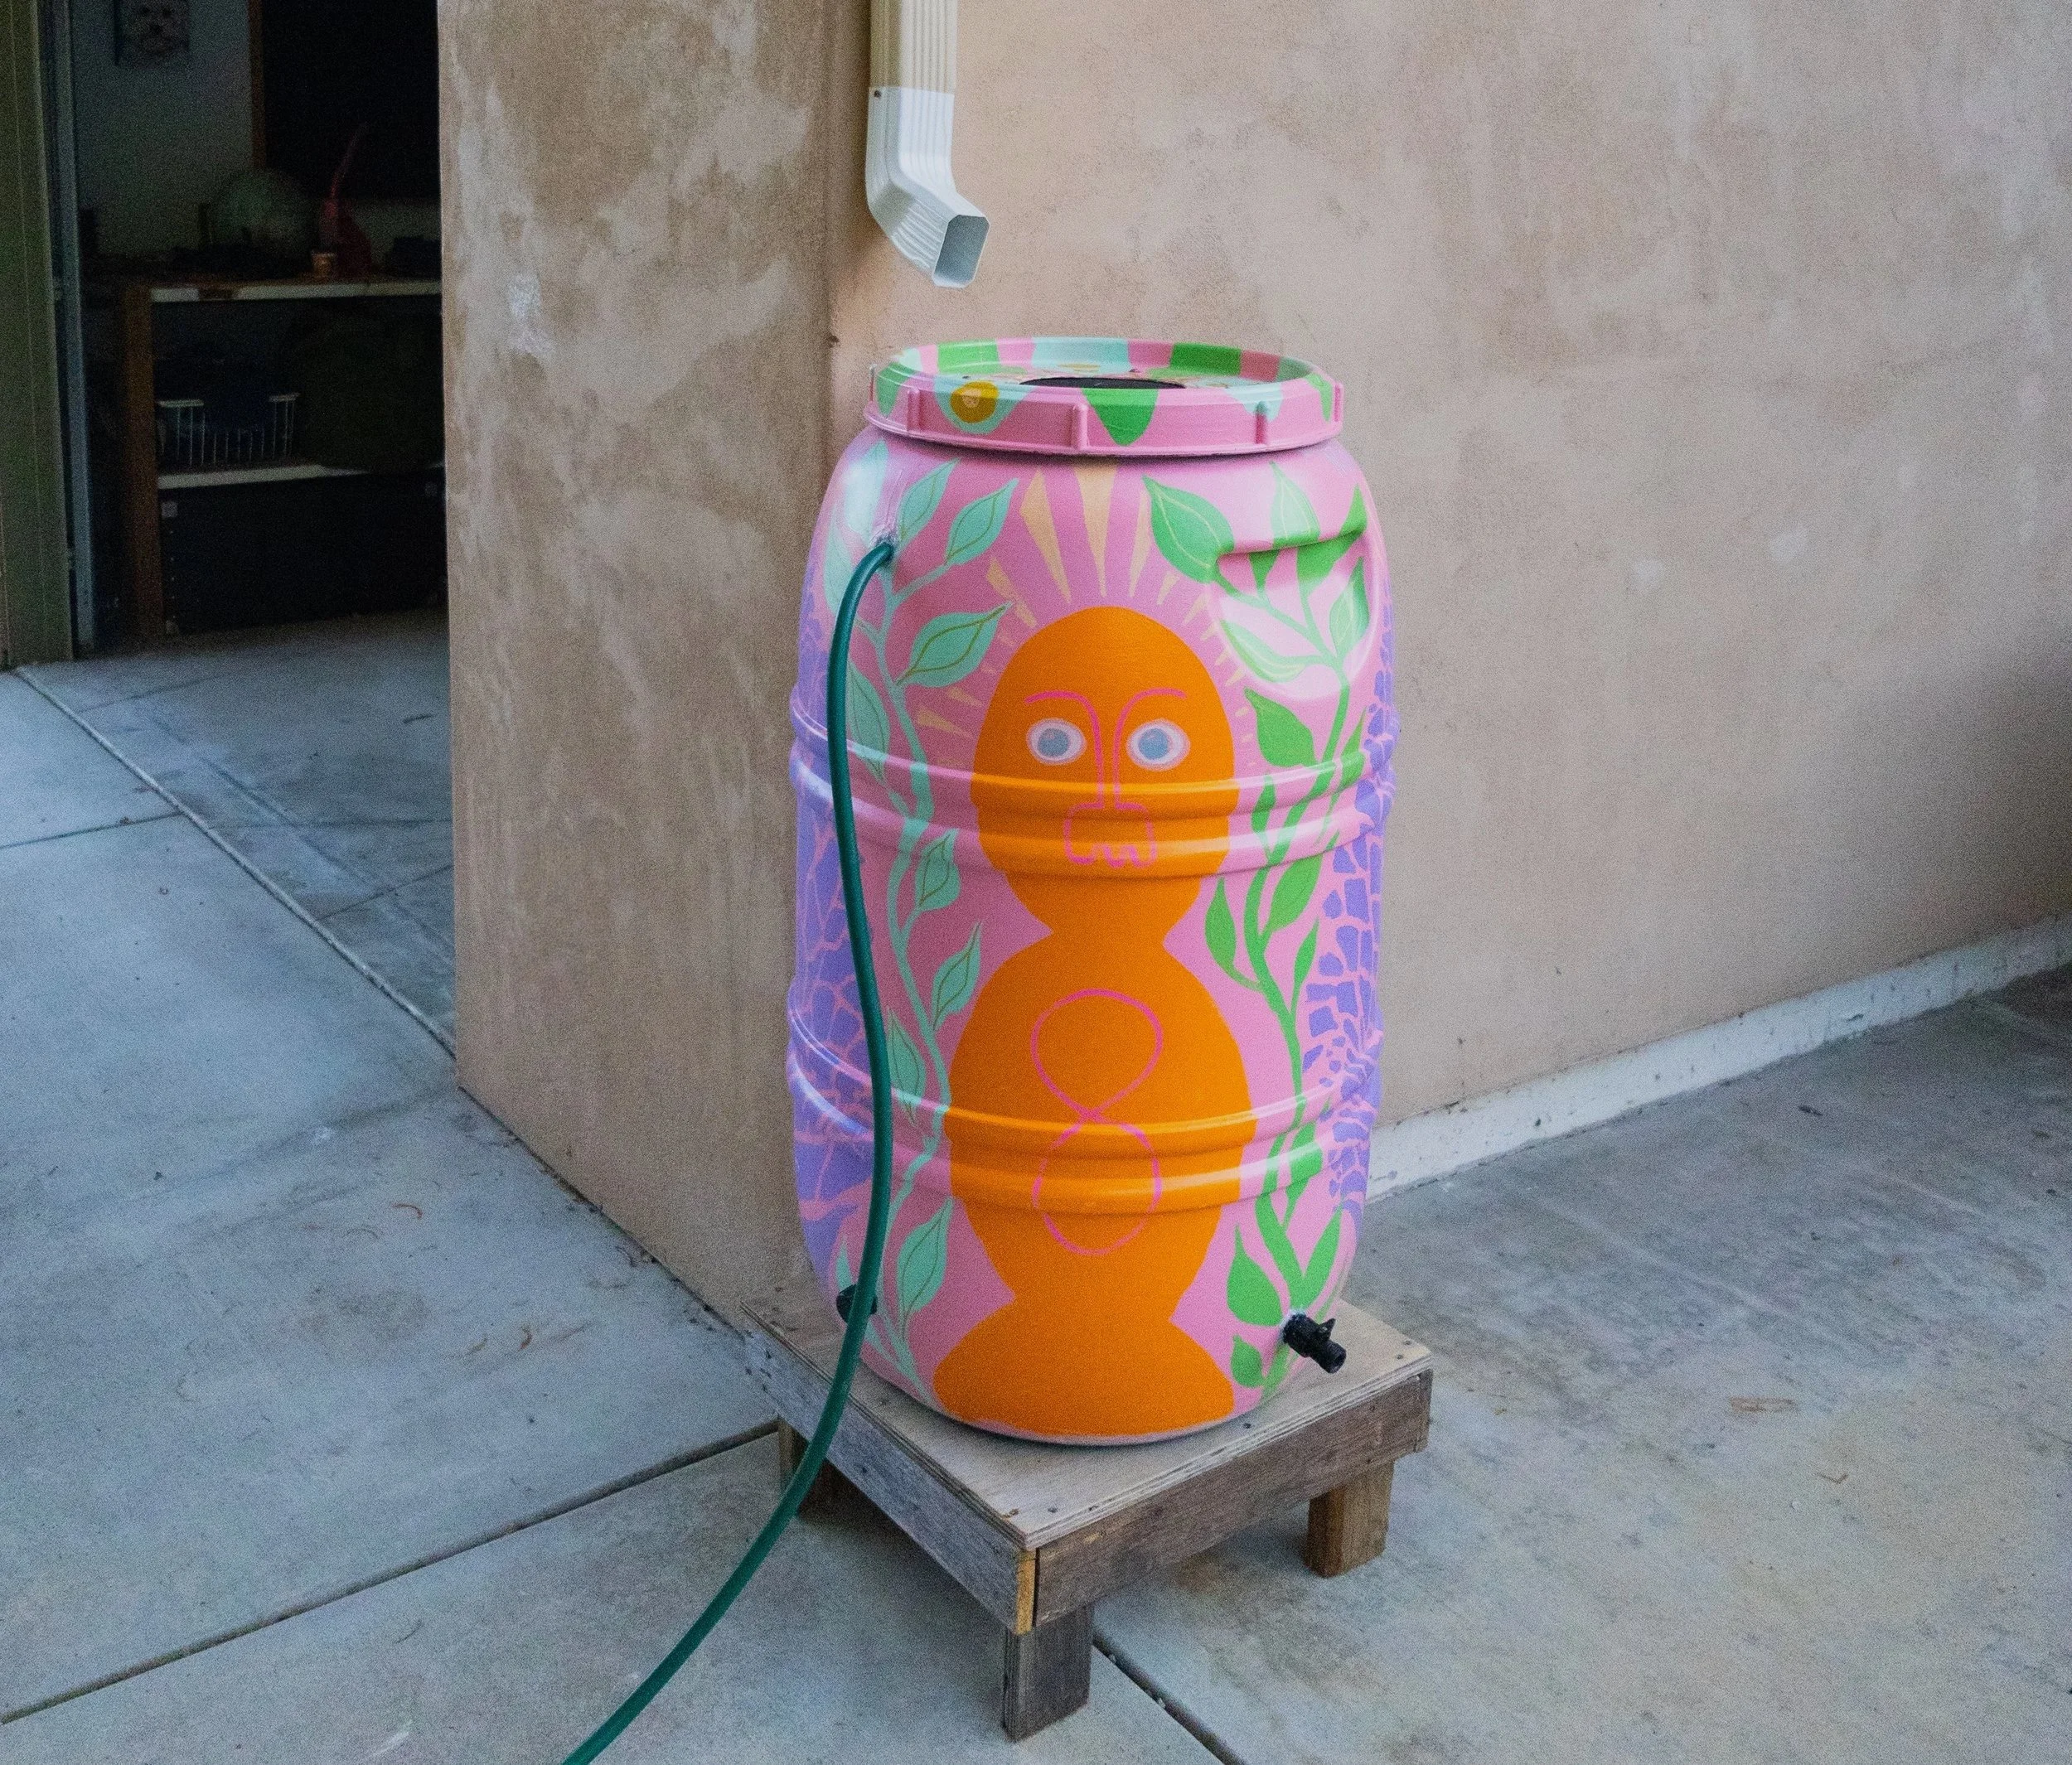
6. Add an overflow hose/rain garden (optional)
You can attach a hose to the top spout near the lid and redirect it to a nearby tree, plant, or rain garden. To make a simple rain garden, choose a low-lying spot near the barrel and plant native, water-tolerant plants or seeds in a shallow depression
How To Paint A Rain Barrel
-
![]()
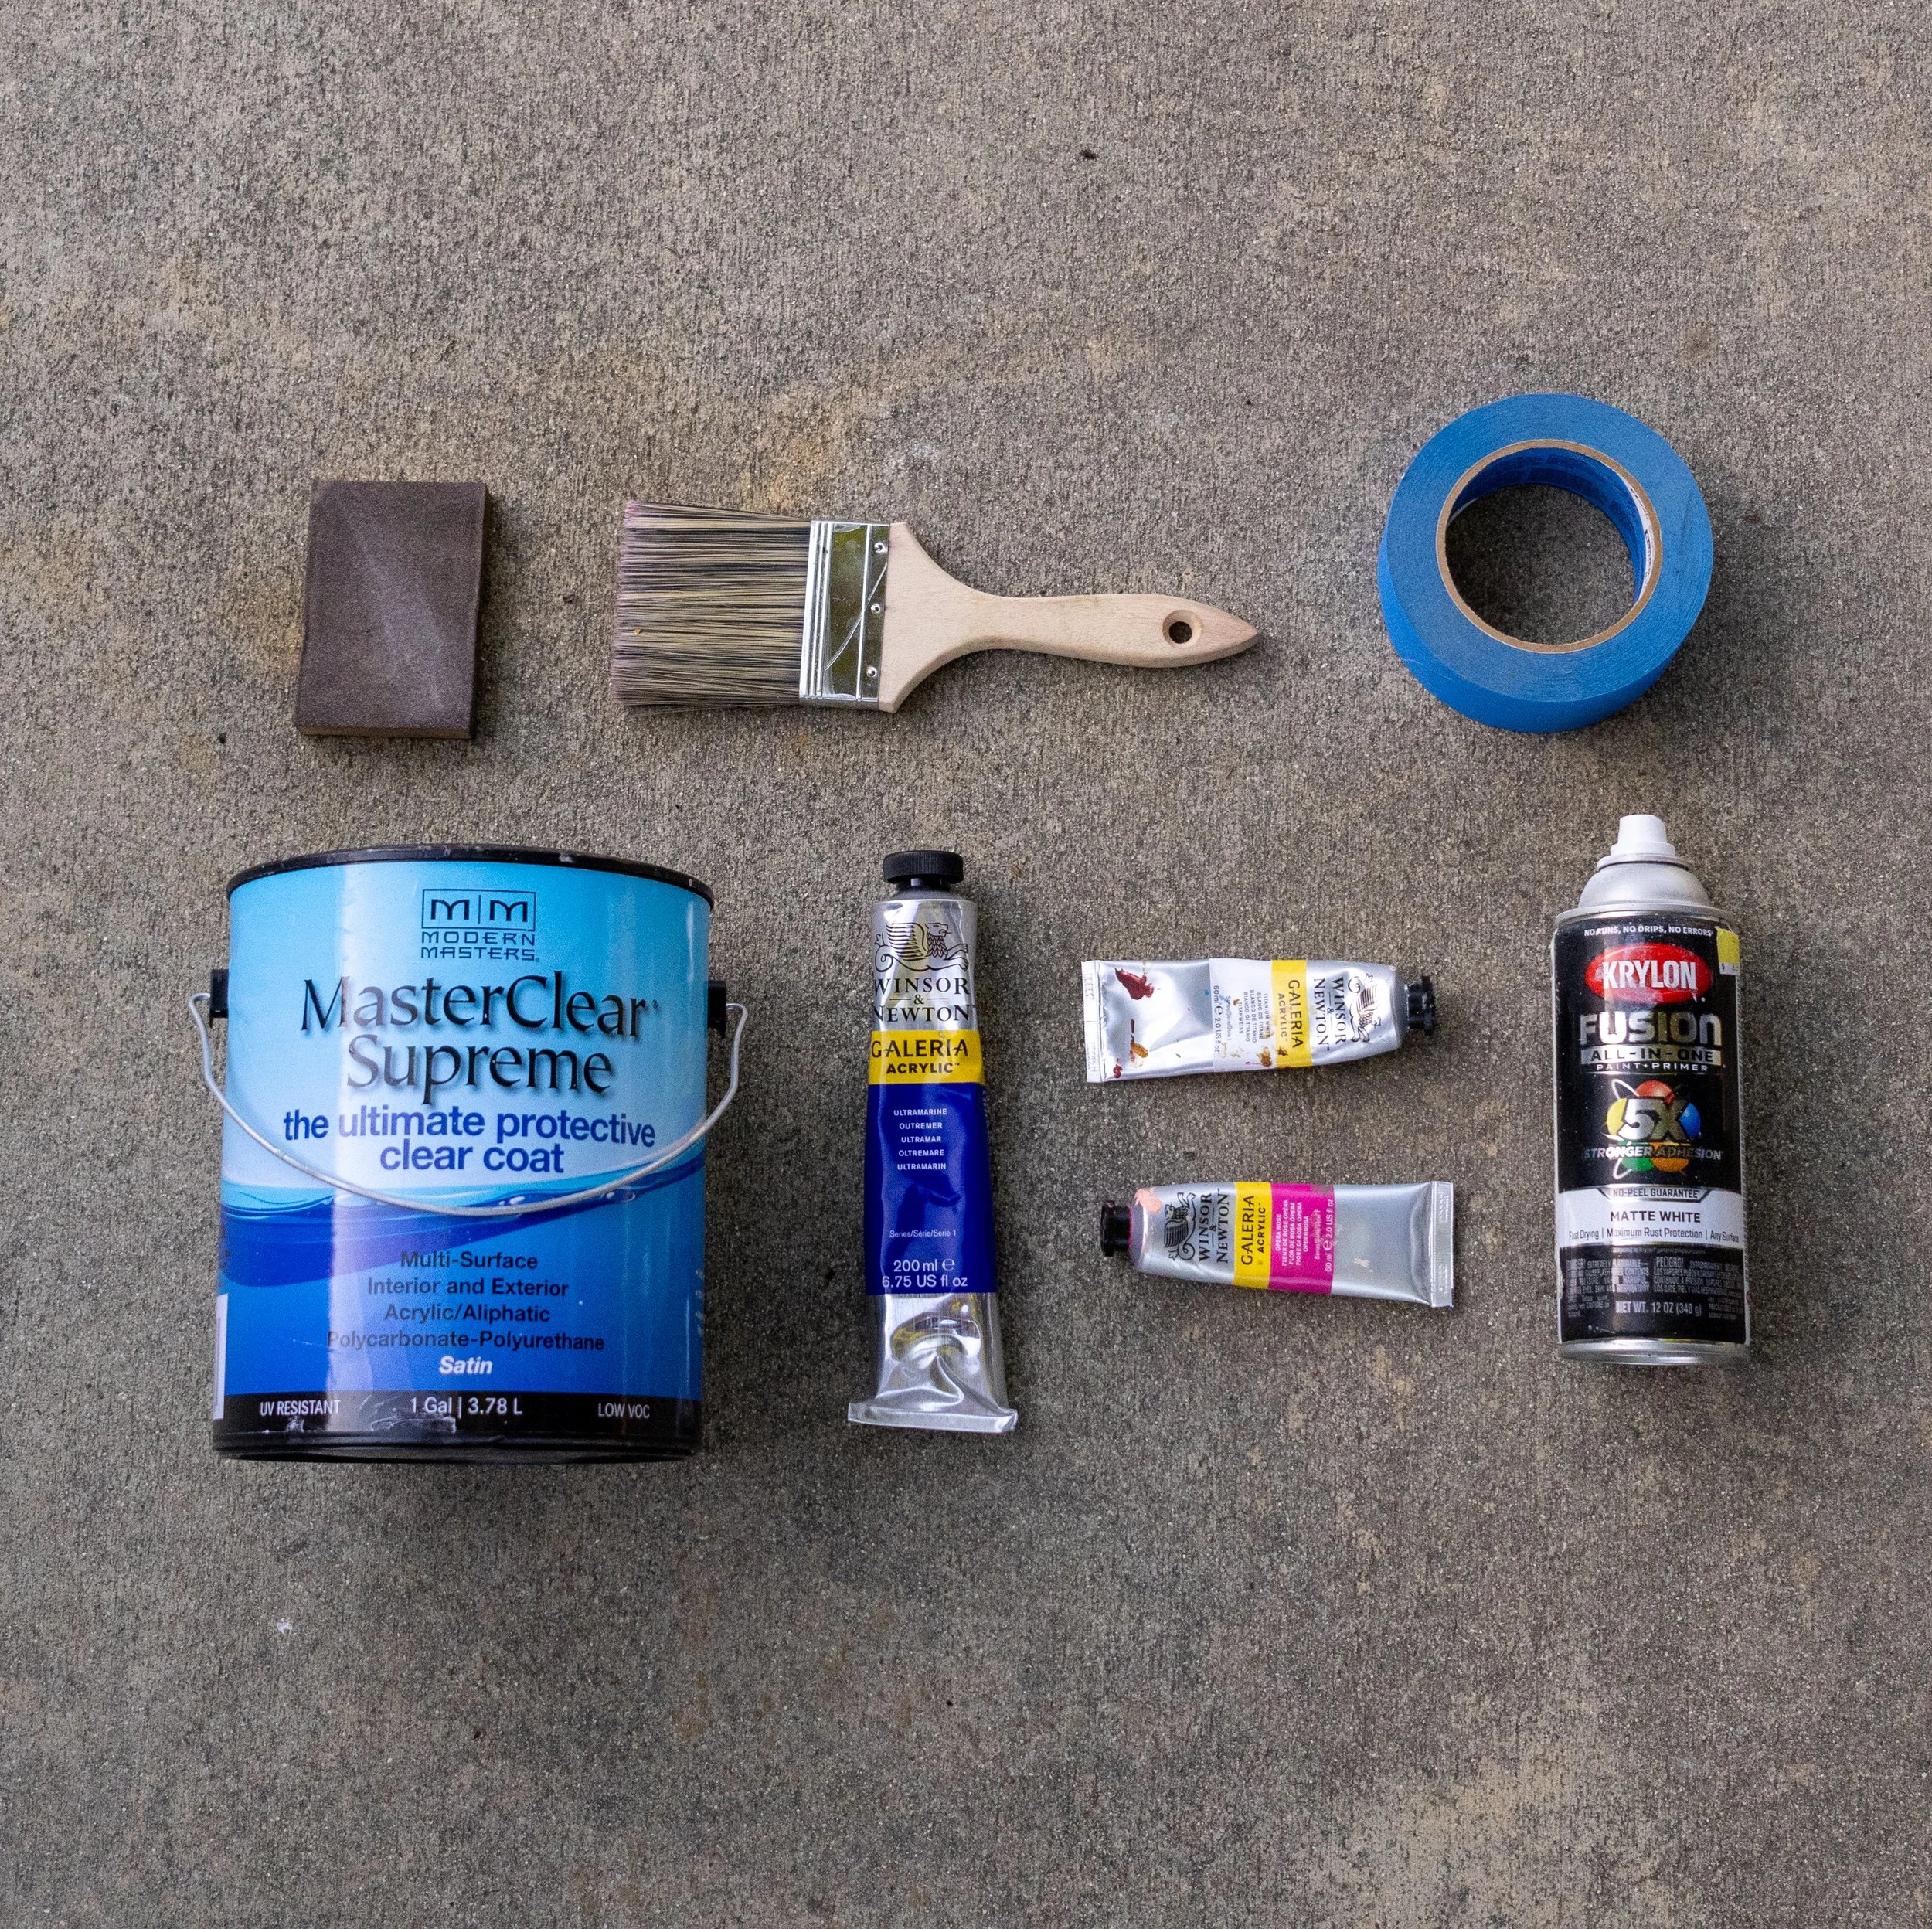
1. Gather Tools
To paint a rain barrel, you will need: Soap/water, sponge, sandpaper, plastic primer, paint, paint brushes, tape, and sealer. See suggested product links below.
-
![]()
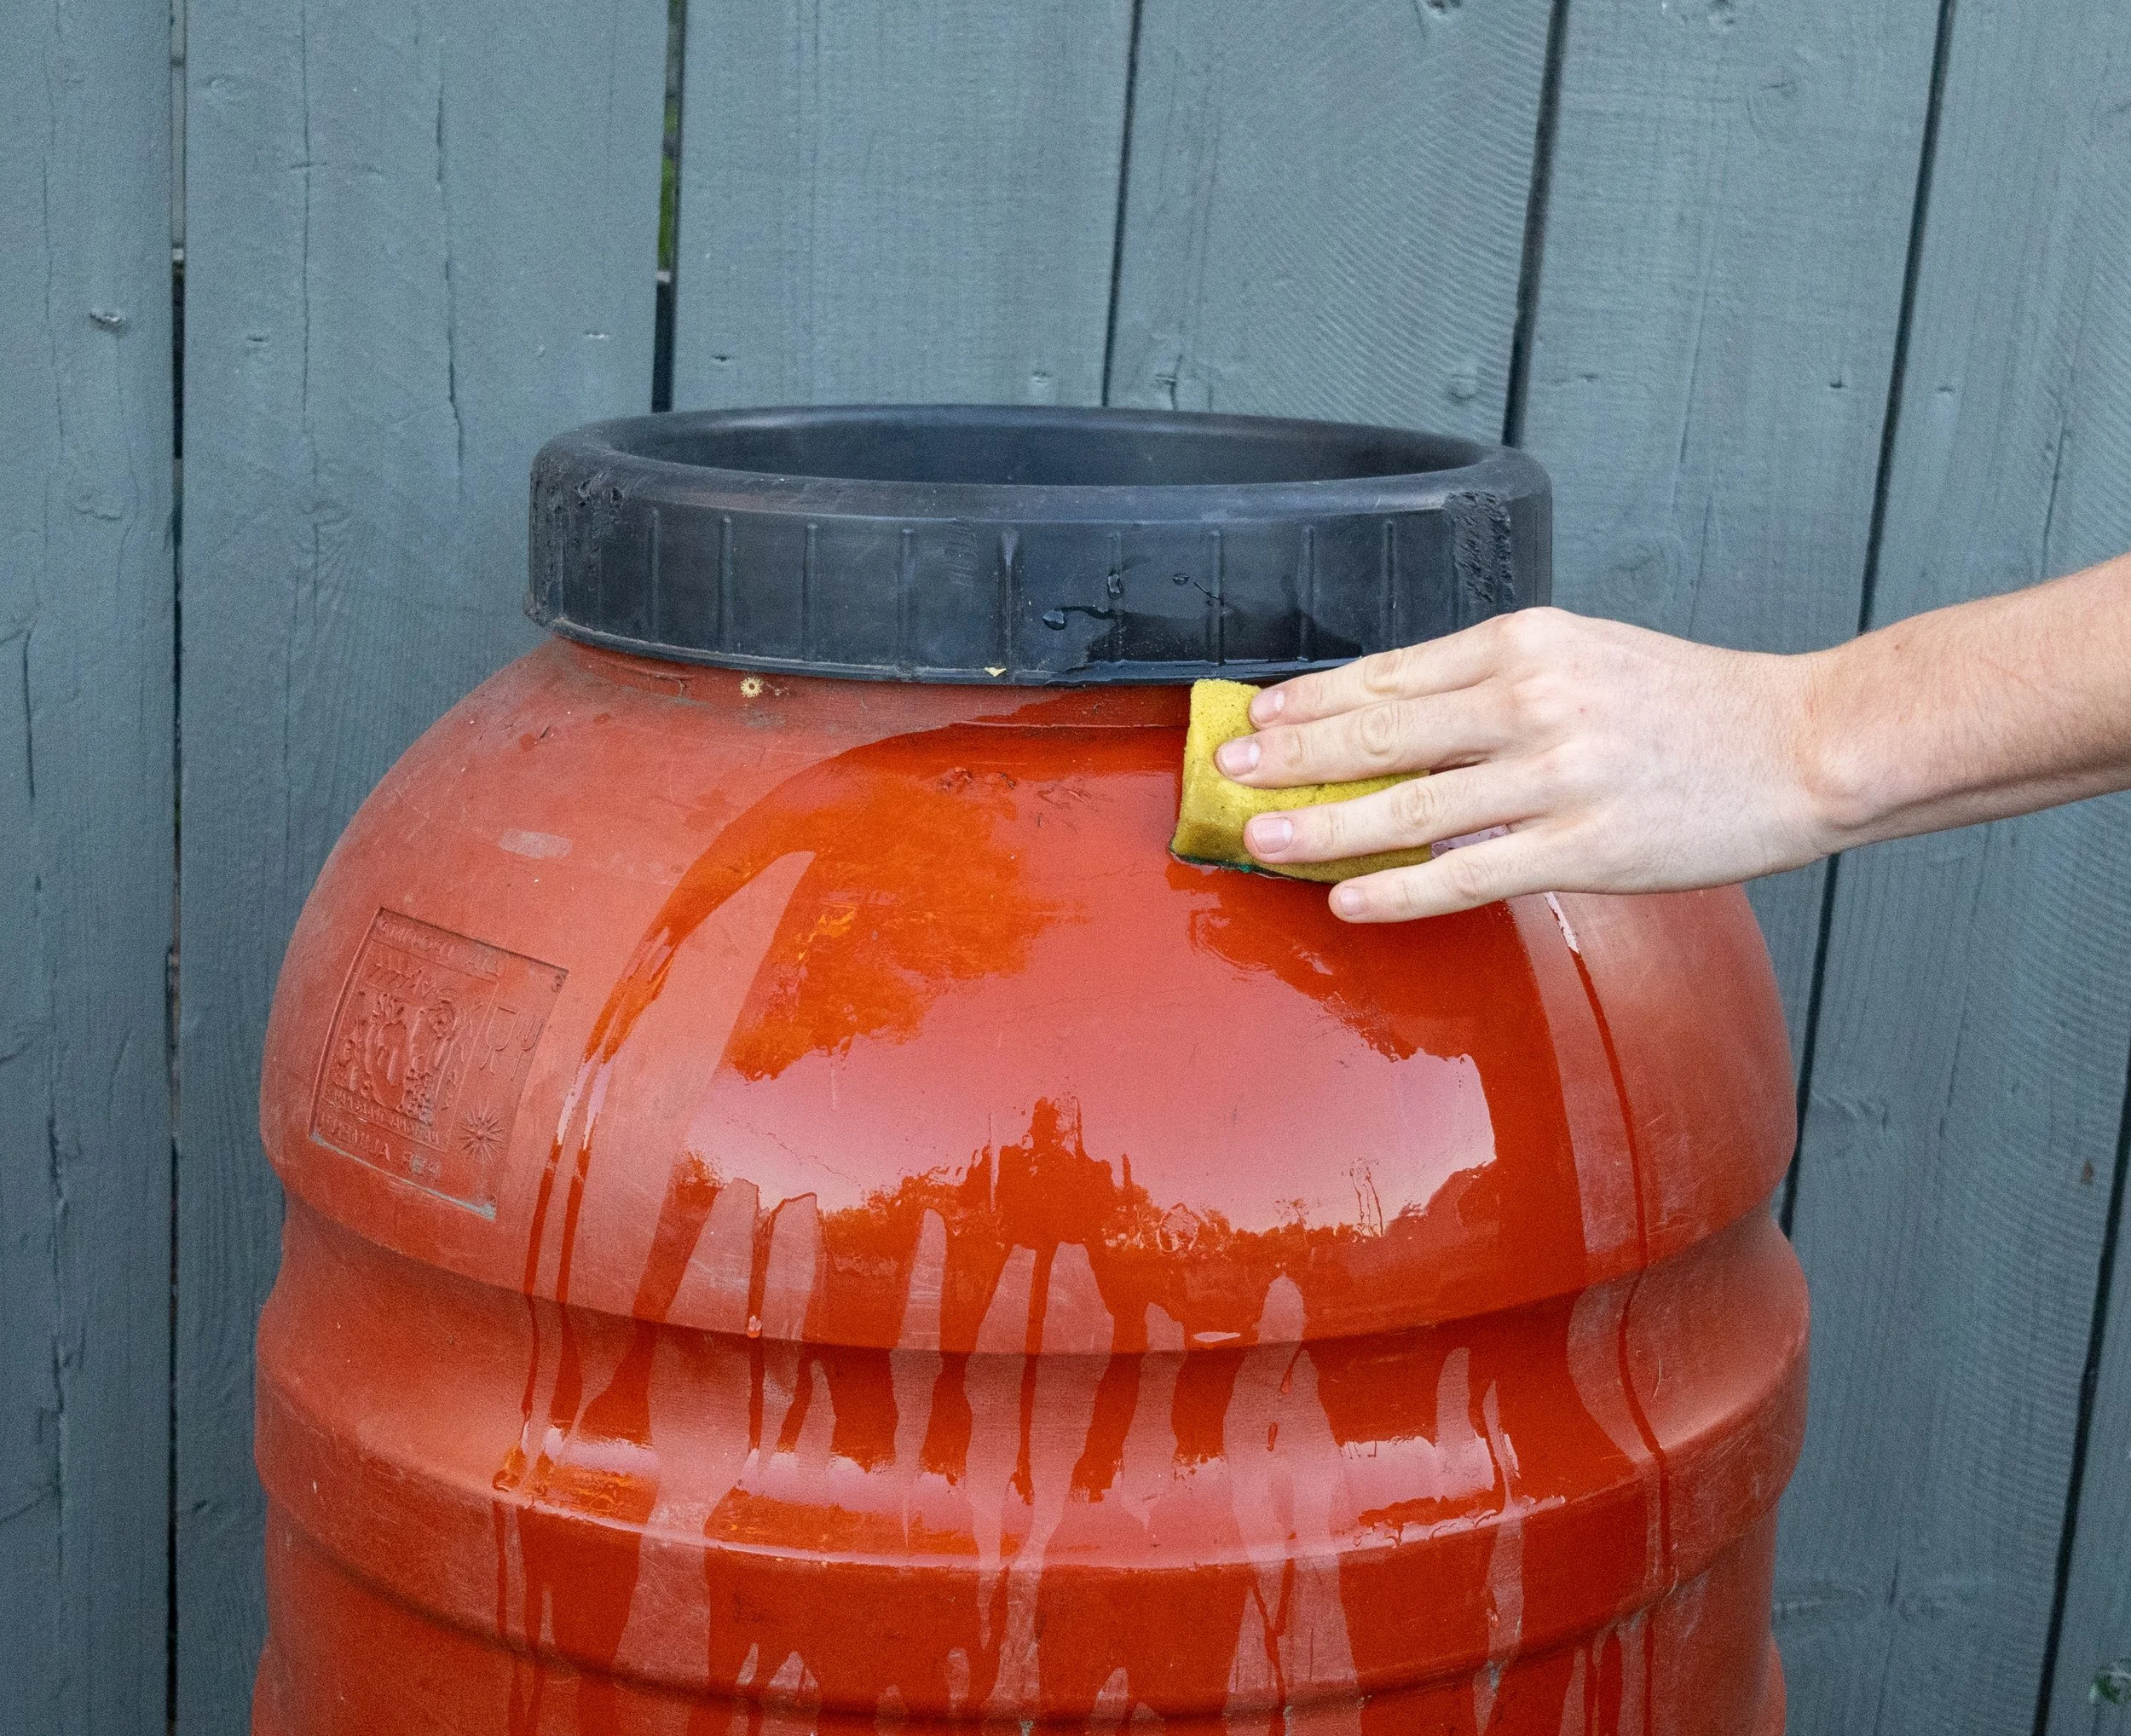
2. Clean
Clean the exterior to remove dirt, grime, and labels using soap/water or a 1:1 mixture of water/vinegar. Scrub the entire barrel and rinse, let it fully dry.
-
![]()
3. Sand
Sand the entire surface with 220-grit to 400-grit sandpaper to remove the glossy waxy coating and create a better surface for the primer to adhere to. If you dont sand the paint will likley not adhere and could peel off.
-
![]()
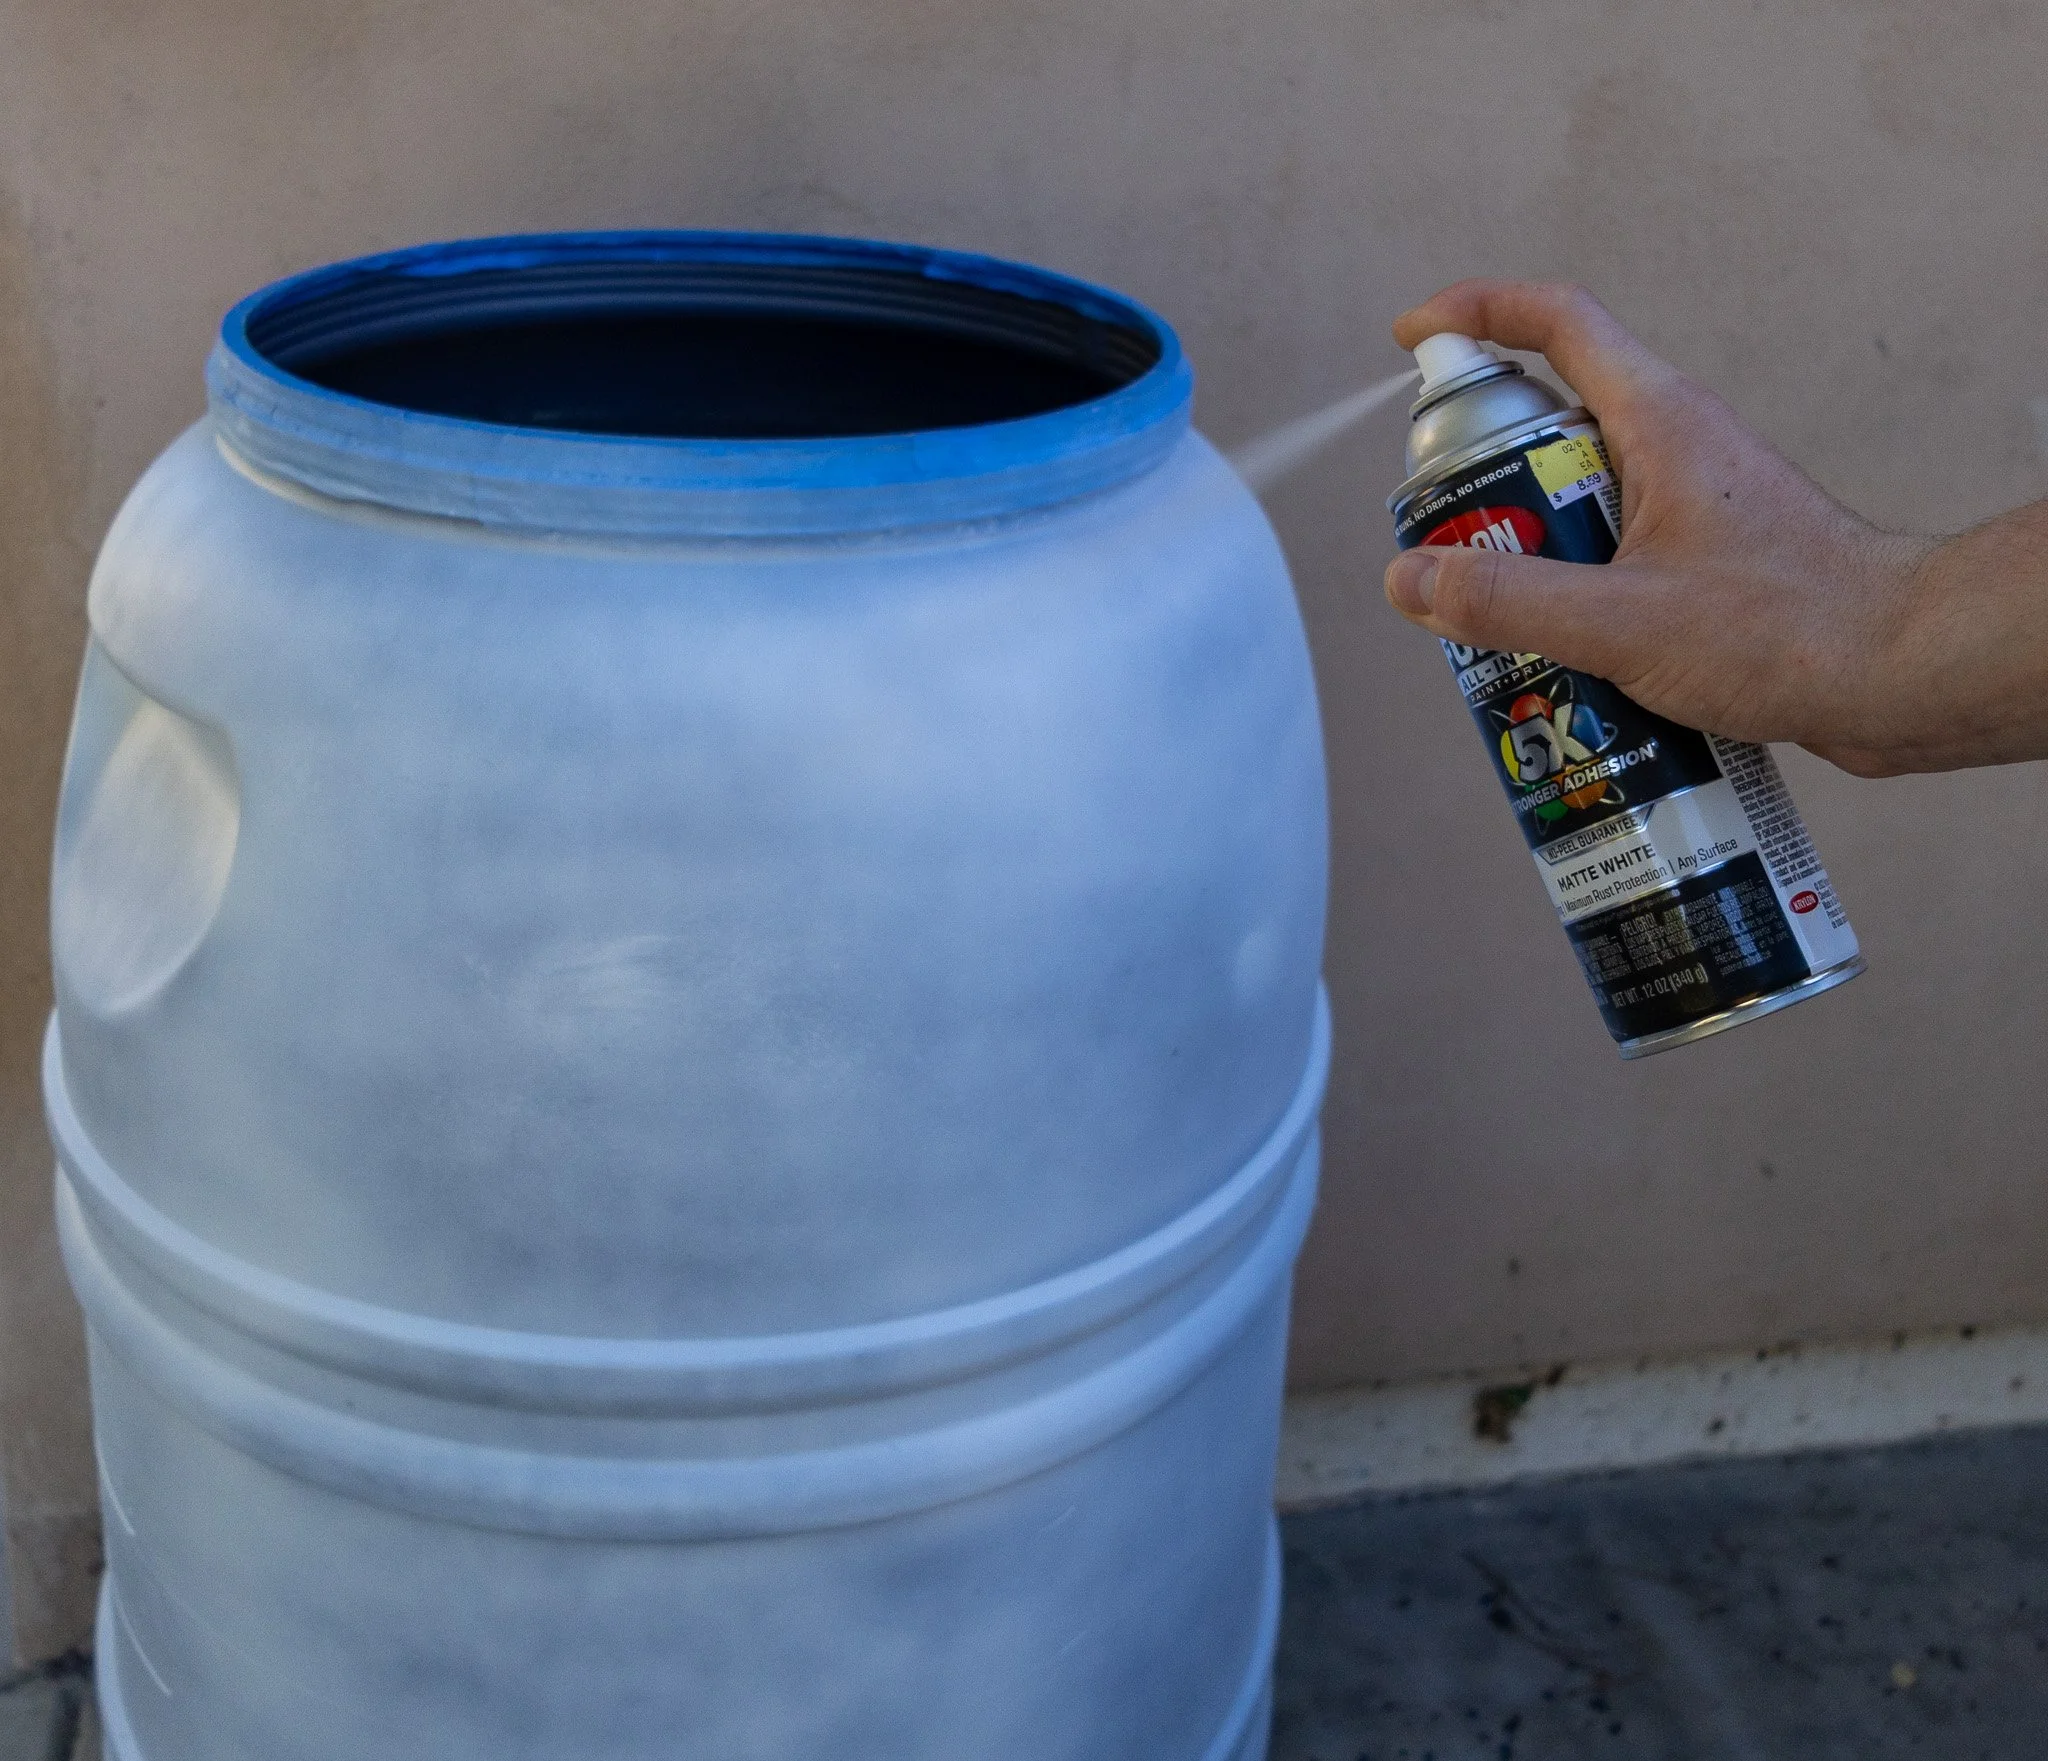
4. Prime
Tape the barrels rim and spouts, then apply a plastic primer to the barrel. Use the form of a spray can: Shake the bottle for 2 minutes before using, wear a mask, and spray the entire barrel from 8-10 inches away. Spray the barrel outisde and on a tarp. Apply 3 coats and wait 20 min between each one. If you're using a paint+primer mix after the 3 coats, you should not be able to see the original barrel colour. Use 1 can per barrel.
-
![]()
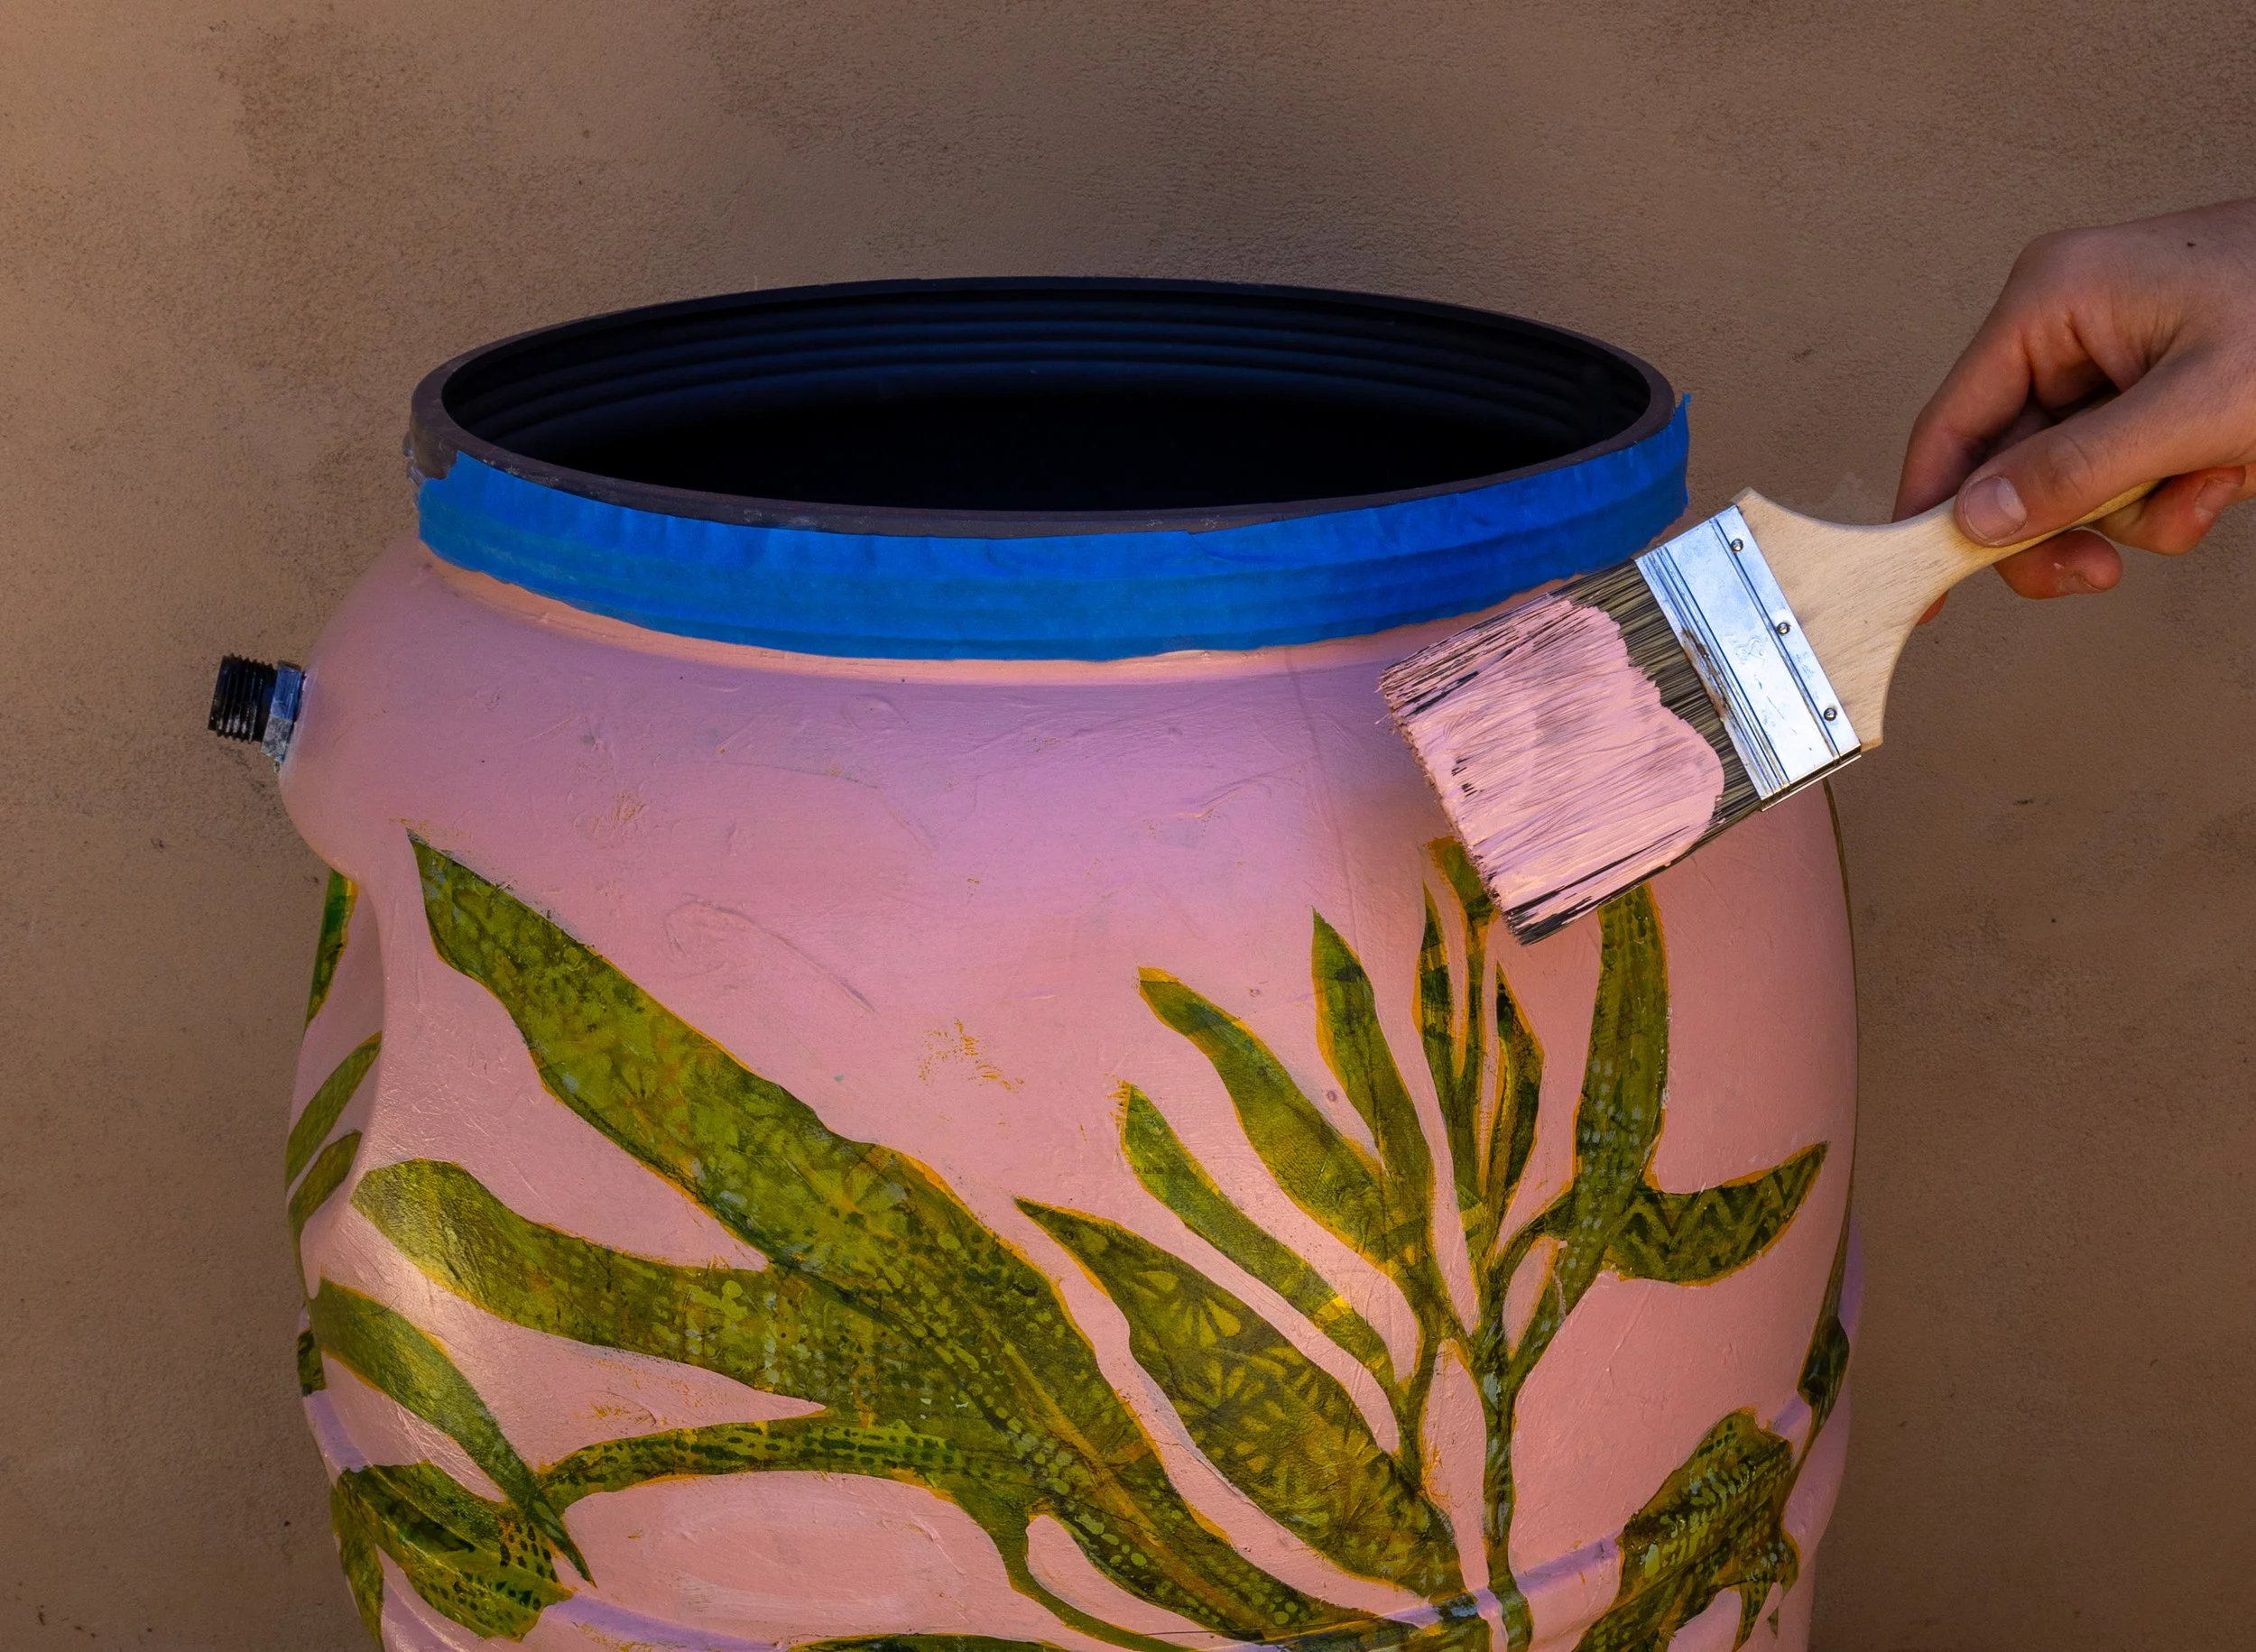
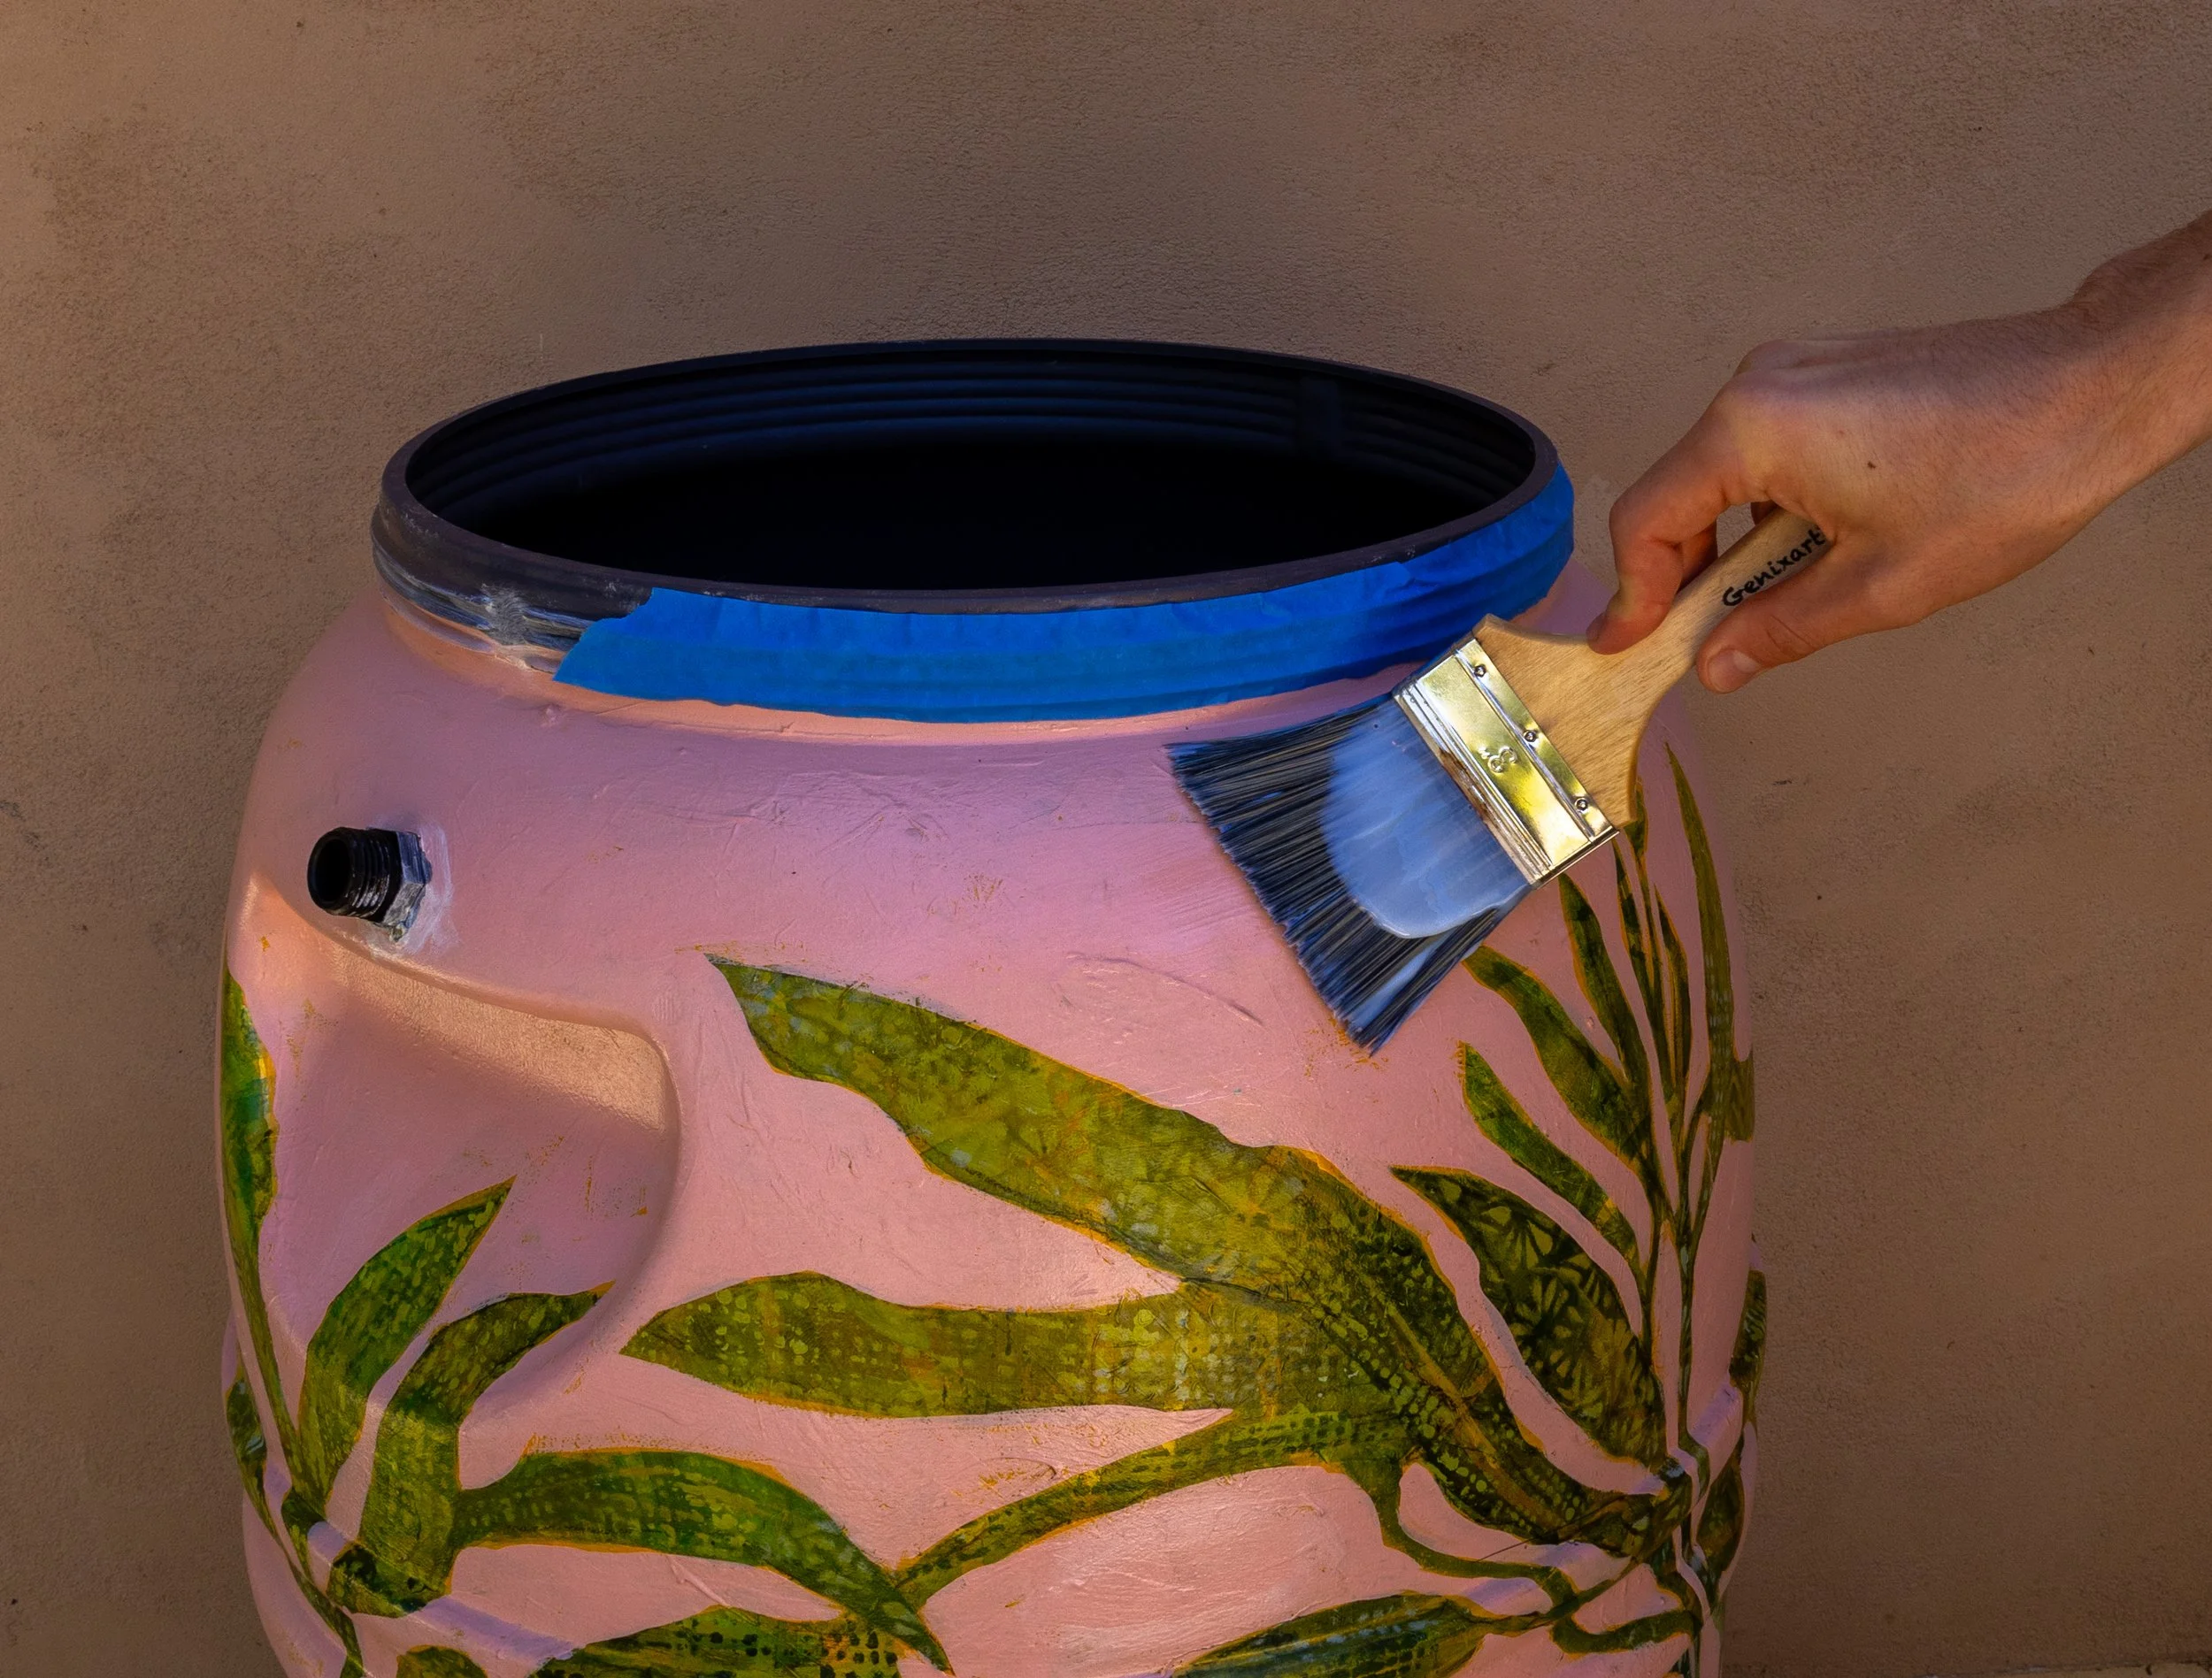
5. Paint
Get creative! This is where you can turn your rain barrel into something unique and expressive. Ideally, use outdoor acrylic paint. You can sketch your design lightly with a pencil first and use painter’s tape to create clean lines.
-
![]()
6. Seal
After the paint is fully dry (24-48 hours), apply a clear, UV-resistant water-based protective coat to prevent chipping and fading. If it is oil-based, it will add a yellow grime to any light-colored painted areas. Apply the sealer indoors. Do not use a spray sealer, as it is hard to tell if it is evenly distributed. Use a paint-on version, stir it, do not shake, and use a large brush and or paint roller for flat surfaces. Apply 3 even coats. Allow the sealer to fully cure before installing the barrel (2-7 days)

Suggested Products
This list includes all the tools and materials needed to install and paint a rain barrel. Some products are commonly available used at local marketplaces such as Facebook Marketplace or Craigslist. Other items are generally purchased new for the best results. Each product page notes whether a used option is practical or recommended.
-
Rain barrels can often be purchased used from local marketplaces without any loss in quality. They come in a range of sizes; the most common is 55 gallons, but if you have more space and time, larger 100–200+ gallon barrels are also available.
https://www.homedepot.com/p/Terra-Cotta-Rain-Barrel-55-gal-Model-TC-55-TC-55/312999960
-
Risers can often be purchased used without loss of quality. You can use concrete blocks or bricks to elevate your barrel or buy an already-made wood or metal riser.
https://www.homedepot.com/p/Rainbarrel-Pedestal-Riser-PED/322132856
-
Diverters can be purchased used, though they are almost the same price new as used ($15-$40). Confirm the diverter matches your downspout before buying.
-
For best results, these items should be purchased new. Used versions may not perform as well or could be compromised. Ensure any primer will work on plastic, and any sealer to be water-based and clear.
Primers (Various base colors)
https://amzn.to/4aX1q9k - White
https://amzn.to/4rohBBf - Green
https://amzn.to/4bfkKgM - River Rock
Sealers
https://amzn.to/40n3wJw - Cheapest
https://amzn.to/4s2cEiJ - Good
https://amzn.to/4swRyZN - Good
https://amzn.to/3N3Z6UT - Highest Quality
-
For best results, use outdoor acrylic paint. If you use the highest quality sealer, it doesn’t matter as much what paint you use. You can use thinner brush sets for detailed works and bigger brushes/rollers for less detailed works and for sealing.
Paint Sets
Brushes
-
These are general tools needed to install and paint a rain barrel, most of which you likely have at home. If not, these are good options.
Hacksaw & Snip
Drill & Screws
Watering Can
Sandpaper
Tape
To capture even more rain, you can turn your yard into a "living sponge" using simple earthworks. First, find a spot where your yard naturally tilts or angles down. Dig a long, shallow ditch along a flat line to catch running water. Take the dirt you’ve dug out and pile it on each side of the dugout area. This creates a basin that forces rainwater to “slow, spread, and sink” into the dirt instead of rushing away. To finish, cover the berm with mulch and plants to prevent erosion. This simple earthwork recharges groundwater and keeps your garden hydrated long after the clouds clear.
Maximize Your Impact: Swales/Berms

Frequently Asked Questions
-
In Ojai you can purchase a rain barrel at The ECO Store, 460 N Ventura Ave. Rain barrels are available at most hardware stores like Home Depot or Lowe's, through online retailers, or even cheaper on used marketplaces like Facebook Marketplace or Craigslist. Check out our suggested products above for vetted options you can order online.
-
You can access the water by filling a watering can at the spigot or by attaching a standard garden hose to the bottom outlet. Because the system is gravity-fed, the water pressure will be significantly lower than a standard utility tap.
Recommended Uses:
Gardening: Ideal for hand-watering trees, shrubs, and flowers.
Edible Plants: When watering food crops, apply water directly to the soil rather than the fruit or leaves.
Irrigation: Best suited for slow-drip irrigation lines.
Outdoor Chores: Use for washing vehicles, rinsing patio furniture, or cleaning tools.
Note: Harvested rainwater is non-potable. Do not use it for drinking, cooking, or personal hygiene.
-
Rain barrels require very little maintenance. Check the screened lid occasionally to make sure leaves and debris are not blocking it. Clear the screen if needed. If the water starts to smell off, empty the barrel and wait for the next rain to wash it out or clean it.
-
Rinse the barrel occasionally to remove sediment and organic material. A gentle cleaning solution can be made with a small amount of castile soap and vinegar or lemon juice mixed with water. After cleaning, empty the water onto landscaping where the diluted solution will not harm plants.
-
Most rain barrels include a high-density mesh screen designed to keep mosquitoes out. Using the water regularly and keeping the screen intact helps prevent mosquito problems. Non-toxic mosquito control products can also be used if necessary.
-
No. Rain barrel water is non-potable and should not be used for drinking or cooking. It may contain dust, roof materials, bird droppings, or other pollutants. Use the water for anything you would use your hose for. You can filter the water at your own caution.
-
Some algae growth is normal and generally does not harm plants. However, algae can occasionally clog the spigot, so periodic cleaning may be helpful.
-
Water can be stored for varying amounts of time depending on use and conditions. In general 1-3 months is ideal, and it is best to use the water regularly so the barrel is ready to capture the next rainfall.
-
Rainwater is generally safe for garden use and is actually better for your plants than tap water; it's free of chlorine, fluoride, and the agricultural pesticides that can leach into Ojai's groundwater wells. While microplastics are present in rainwater due to atmospheric pollution, they exist at trace levels consistent with the environment broadly and do not pose a meaningful risk for garden irrigation.
-
Yes. California passed the Rainwater Capture Act specifically to encourage what we’re doing here. The state wants you to do this.